
FREE Crochet Wind Spinner Pattern
For Your Porch This Spring
Crochet wind spinners have taken the internet by storm lately, and for good reason! I wrote up this free crochet wind spinner pattern so you can try out this lovely and easy project yourself.

With so many beginner crocheters out there looking for easy crochet projects this summer, crochet wind spinners fit the bill perfectly!
And even if you're an advanced crocheter, there are so many 'spins' you could make to this project to add your own personal touch.
These wind spinners are super easy to whip up, they are great stash busters, make cute decorative items in your home and are also perfect to give away as gifts.
There are a variety of patterns you could use to make these wonderful crochet wind spinners, but what I'll show you here is a basic wind spinner you can start out with.

Crochet Wind Spinner PDF Printable + Gift Tags
Making this wind spinner for a gift or to sell at a craft market? For a small fee, add a professional look to your crochet wind spinner with these PDF printable tags.
Springtime Wind Spinner
Crochet Pattern
(PDF Printable)

Wind Spinner
Gift Tags
(PDF Printable)

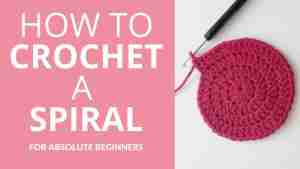
In a previous post, I showed you how to crochet a flat spiral. So now, we'll learn how to crochet a 3-dimensional spiral that twirls around itself creating this cute curly texture that is so idea for this crochet wind spinner project.

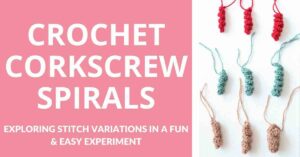
Then there's the corkscrew spirals, which is the technique I'll use to crochet this wind spinner. In this little experiment I made, you can see the difference between the type and number of stitches used and how these affect the look of your spirals.

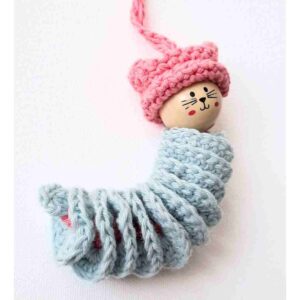
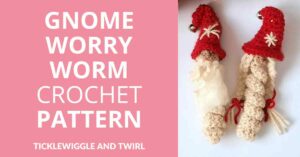
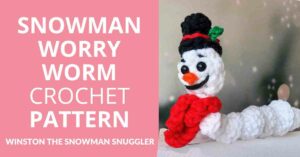
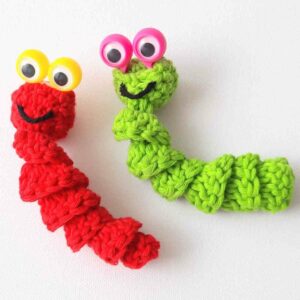
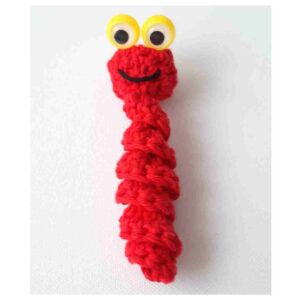
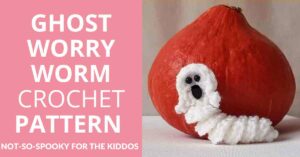
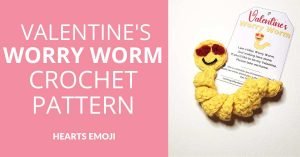
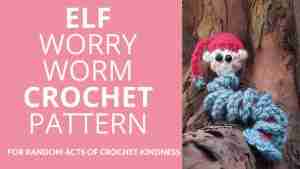
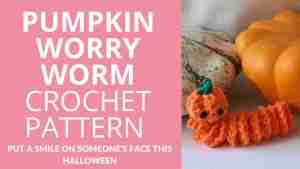
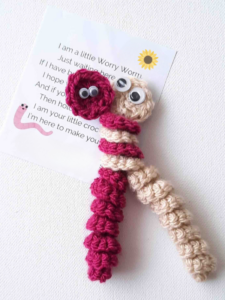
If you think you want to start with a smaller project to test out this spiral technique, have a look at this blog post for Crochet Worry Worms. They are super easy and fast to whip up and will show you how easy it is to get this cute spiral effect.

Interesting Note: Did you know that the technique used to crochet curly surfaces is called hyperbolic crochet? When I discovered this was actually a mathematical term for "negative curvature", I was really intrigued!
Think of the types of curvature you see in coral reefs or lettuce leaves. These organic shapes can be replicated in crochet by adding stitches at a constant rate to each row of crochet. The more frequently you add stitches, the curlier (and more negatively curved) your crochet project gets. Isn't that awesome?! You can watch a video about hyperbolic crochet here.
Now let's experiment with hyperbolic crochet with our wind spinner pattern...
And if you're making these for a gift, I've made some Printable Gift Tags For you 🙂
Disclaimer: This post contains affiliate links, which means I receive a small commission, at no extra cost to you, if you make a purchase using the Start Crochet links. Please see my disclosure for more details.
Like this pattern, but not ready to work it yet? Save it to Pinterest!

What You’ll Learn From This Pattern
- How to crochet a 3-D continuous spiral using (ch) chain, (sc) single crochet and (dc) double crochet stitches using a variety of different colours.
Materials Needed
- Some classic Aran yarn (4 colors of your choice). Any yarn would do really, just make sure it's not hairy or fuzzy and that they are all similar weight yarns. I used Paintbox Yarns Simply Aran 5 Ball Colour Pack Designer Picks in Summer Garden by Kate Eastwood for this crochet wind spinner,
- Yarn Color 1: Lime Green
- Yarn Color 2: Ballet Pink
- Yarn Color 3: Raspberry Pink
- Yarn Color 4: Blush Pink

- Crochet hook that fits your yarn. Generally I use between a size US G/ 4mm to US H/ 5mm hook. For this project I used a 4.5 mm hook.
- A tapestry needle
- A pair of scissors
- Beads or any embellishment you'd like to add to your wind spinner.

Abbreviations
- ch = chain
- sc = single crochet
- dc = double crochet
- st = stitch
- sts = stitches
- fo = fasten off
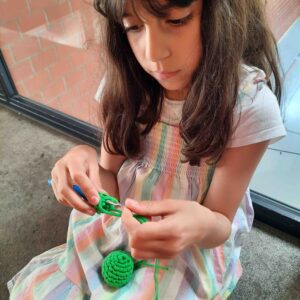
Skill Level
Beginner
Are you just learning how to crochet? Have a look at these awesome crochet kits, perfect for beginners! I wrote a complete hands-on review on The Woobles Kits for you 🙂

Gauge
16 stitches and 8 rows = 4" (10) cm in double crochet (US)
Gauge is not really that crucial for this project. Just try experimenting with different hook sizes & different weight yarns to get a gauge you are happy with for the project you are working on.
If your wind spinner looks narrower than you anticipated, try a thicker weight yarn or add another row or two to make it wider.
Size
This Wind Spinner should measure about 28.3" / 72cm length, excluding the tassel.
If you want your wind spinner to be longer, just increase the number of stitches in your beginning chain.
Yardage
68 - 70 yards (62 - 64 m)
Notes
- You can use any type of yarn as long as you have a corresponding crochet hook size (check yarn label for recommendations)
- You can make the pattern larger or smaller by changing the type of yarn and/or hook size.
- Numbers at the end of each row [in brackets] indicate the number of final stitches in that row.
- Please note that I use US crochet terms.
Subscribe To My Newsletter
Would you like to stay updated with new free patterns, crochet tips & tricks, and delightful crochet inspiration sent straight to your inbox? Please enter your Name & Email below 🙂
Stitch How-To Instructions
Instructions for Ch (Chain):
Bring the yarn over the crochet hook from back to front and hook it. Draw hooked yarn through the loop of the stitch on your hook and up onto the working area of your hook.
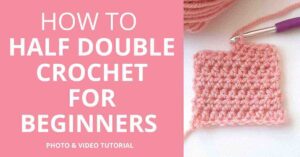
Instructions for sc (Single Crochet):
Insert hook into stitch, yarn over, pull the loop back through the stitch (you now have two loops on hook), yarn over again and pull through both loops on hook (note: this is equivalent to the UK Double Crochet (dc) stitch)
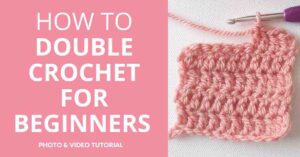
Instructions for dc (Double Crochet):
Yarn over first, then insert hook into stitch, yarn over, pull the loop back through the stitch (you now have three loops on hook), Pull your working yarn over again and pull through two loops on hook . You now have 2 loops on your hook. Yarn over and pull through the last two loops on your hook. You are left with only one loop on your hooks, which means you've completed your dc stitch. (note: this is equivalent to the UK Trebble Crochet (tc) stitch)
Instructions for Sl St (Slip Stitch): Insert hook, yarn over, pull the loop back through your last stitch AND through the loop on your hook (through both stitches).
Instructions for Fastening Off: After the last stitch of the last round, cut the yarn, leaving a 6-inch end. Draw the cut end of your yarn completely through the stitch & pull to tighten knot.

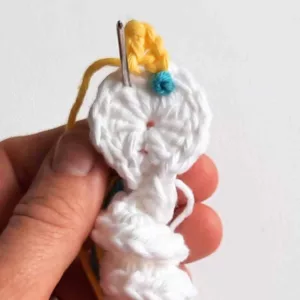
Crochet Wind Spinner Pattern Photo Tutorial


Add Embellishment:
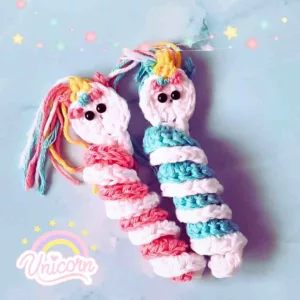
- Add wind spinner embellishments. You could add anything to the bottom of your wind spinner to give it some weight and make it look super pretty. Some ideas could be tassels, beads, pom-poms, or a small amigurumi that fits the theme of your wind spinner.
- Here's Sunflower Wind Spinner you might be interested in.

Finishing Touches:
- Leave the center strand of Lime Green yarn that you used for your beginning chain to hang your wind spinner from. Tie a knot to form a wide ring from which to hang your wind spinner.
- Weave in ends. With your darning needle, weave in the rest of your yarn ends to hide them and secure your wind spinner from unraveling.
- Lastly, if you feel your wind spinner didn't curl up properly, don't worry!
Simply run your finger along the curls to place them in the correct position.
Give them all a little twist, fold them up on top of each other, squeeze them flat together and once you let go, you can pull your wind spinner apart from top to bottom and they'll all fall into place perfectly!

Hanging Your Crochet Wind Spinner
- You can hang your wind spinner either indoors or outdoors.
- For best spinning results, you might want to hang it from a thin chord or fishing line.
- Add some weight to the bottom of your wind spinner by adding embellishments.
- If you're worried about your wind spinner being in the rain, use a yarn that is easily washable so you can wash your wind spinner from time to time.

Want to Simplify Your Crochet Experience?
I've designed many printables you can download for FREE that'll help you with your crocheting. You'll find simple sizing templates, project trackers, free gift tags, crochet terms explained and much more. Head on over to the Start Crochet's Printables Page and download what you need.

I hope you enjoyed this Crochet Wind Spinner tutorial. All you need to do now is get started and you'll get the hang of it pretty quick!
Once you start crocheting one spinner, you'll find yourself wanting to try more color combinations. Think of whom you might to gift them to. I'm sure they'll be thrilled!
Let me know if you have any questions and...
Happy crocheting!
Disclaimer: Information in this crochet pattern is given for reference only. Even though I do my best to ensure all patterns have no mistakes, occasional errors may slip through.
No liability is accepted for variations in finished projects. Please get in touch with me at [email protected] if you think there might be a mistake in the pattern or if you are unsure about how to interpret the instructions.
I’d love to see your finished item, so please tag me using #startcrochet.
Please follow my accounts to see what else I’m up to and to keep in touch:
Pinterest: https://www.pinterest.ch/startcrochet/
Facebook https://www.facebook.com/startcrochet
Instagram https://www.instagram.com/startcrochet
You may sell any finished products that you make from this pattern. However, when selling online, please include a link back to my blog startcrochet.com or tag me on social with hashtag #startcrochet
Thank you!
© All rights for this pattern are reserved to Start Crochet (2022). Copies and/or reproduction and reselling of this pattern is a violation of the law.


I love the wind spinners
Thank you for the gifts tags and wind spinner pattern. I will be making several of these for an upcoming market. Have a wonderful day!
Oooh! I’m so happy you like them! I’d love to see your wind spinners at the market. Hope you get some good sales 🙂 Have a lovely day!
I made my daughter a wind spinner for her birthday. First one I ever made, she just loved it. I will be making some more. I love them. Thank You for sharing the pattern.
That’s so awesome Evie! This makes me so happy that your daughter loves the wind spinner you made her! They really do make great gifts, don’t they? I made a beige & brown one for our 87 year-old neighbor for his birthday last year and it’s still hanging on his porch 🙂
Very very nice
Definitely going to try this.
Thanks for sharing.
…..my first task to do.
Love it!!!