
Finally! I Found The Perfect
Crochet Pattern Testing Method
Are you looking to publish your first crochet pattern design and sell it online?
That's awesome!
Have you heard of crochet pattern testing, but have no idea where to start or go about it?
Trust me... you're not alone!
We've all been there... and some designers have done many pattern tests, but still get frustrated because they haven't figured out the best way to go about them.
Some find it difficult to find crochet pattern testers...
Others get disappointed when the test doesn't go as planned...
because some testers apply to the test and then either don't follow through and even worse... disappear right after they get the PDF pattern sent to them! Ouch!!
Don't have time to read this post right now? Save it to Pinterest for later!
I've personally tried several methods of testing my crochet patterns and I finally found the one that works best for me.
I find my pattern testing to be an incredibly exciting time during which my newly created design actually comes to life in the hands of other makers.
I truly enjoy the experience and the connection I build with my pattern testers so I figured I'd share the process I use step-by-step so that you too can have successful pattern tests.
The Importance of Pattern Testing
You might be wondering why you should bother with crochet pattern testing...
I mean, you could just make a design, write down the steps you took to make it and publish it at that.
Let me tell you, some people actually do just this.
It is possible... you could go ahead and publish a crochet pattern without testing, BUT it won't be very nice when someone comes along later and points out mistakes you've made in your stitch count or other errors in your written pattern.
So to avoid this embarrassment, it's best to have several crocheters test your pattern before you release it to the public.
They will actually work up your pattern and let you know if there are any inconsistencies, inaccuracies or vague instructions that need clarification.
Your instructions might sound logical to you... but others might not understand what you mean to say.
Then it'll get frustrating for them... and they might just leave you a bad review.
So to make sure your written crochet pattern is of the best quality and accuracy, I highly suggest you:
- take the time to test your patterns,
- get the valuable feedback given by the pattern testers,
- and make sure you improve your instructions as best you can before releasing it to the public.
Subscribe To My Designer Newsletter
Would you like me to send you more tutorials, templates, & helpful tips & tricks for new crochet designers? Please enter your Name & Email below 🙂
The Purpose of Pattern Testing
So why is testing your crochet patterns such a big deal?
In short, testing your patterns helps
- identify errors,
- clarify instructions, and
- ensure that the pattern is user-friendly.
It's all about making sure our patterns are as clear and as flawless as possible.
And it's also a great step in getting initial feedback on your pattern and geting a feel of how people are liking it and what they'll be using it for.
Like this post? Save it to Pinterest!
Finding and Selecting Pattern Testers
YarnPond (Paid)
There is a paid platform called YarnPond that specializes in connecting crochet and knit designers with pattern testers and tech-editors.
It's free to sign up to Yarnpond, but you have to pay to publish a testing call.
YarnPond has 2 available plans: Either you pay per pattern or you pay for a monthly membership.
Ravelry (Free)
Ravelry offers a group called The Testing Pool where you can advertise your new or updated pattern for testing. They have their own Guidelines for Testing Relationships, which is very helpful. They steer away from making "rules" and encourage that each designer/tester relationship be worked out between those two people only.
I have not used this myself, so cannot give much valuable information about it here. The method I personally use is mentioned below.

Ribblr (Free with Designer Account )
Team Ribblr just launched their new Testing Tools 2.0 (March 2024). On their platform, you as a designer can assign verified testers, let them access your pattern part-by-part, and remove (or even block) unresponsive testers to protect your patterns from theft / misuse.
Ribblr also offers automated reminders to testers before the due date arrives and they alert you as the designer when someone finishes their test so you can review it.
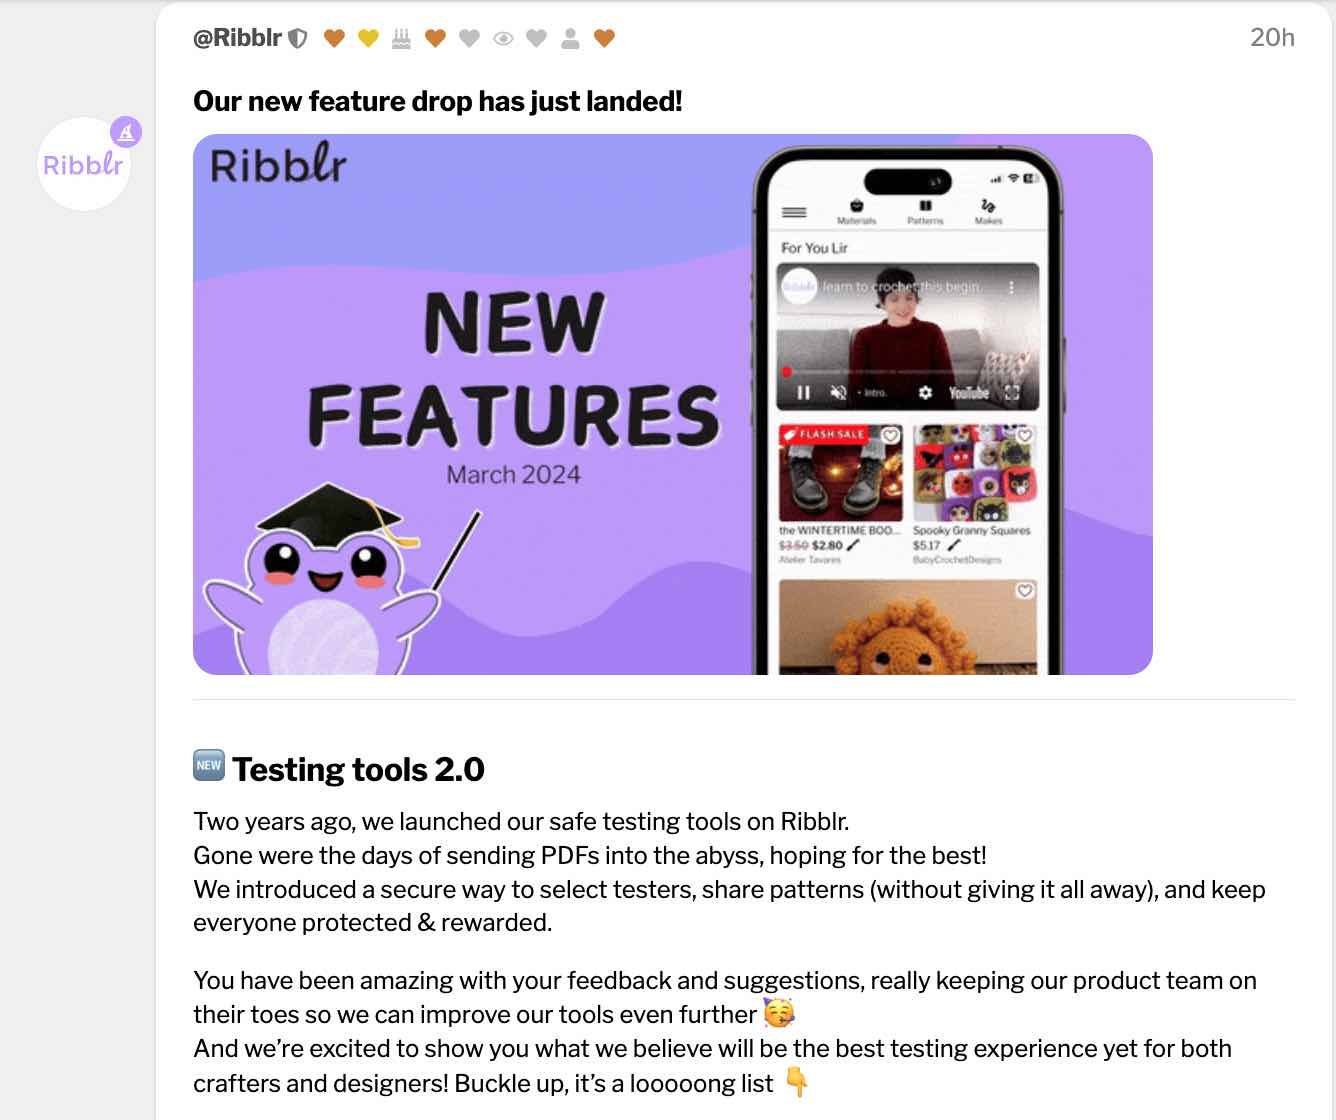
I personally don't sell my patterns on Ribblr, so I don't have much information about how their testing feature works. I'd be delighted to hear from someone who has in the comments below.
It's interesting to read users' comments for this announcement on Ribblr.
Facebook, Instagram & Ravelry (Free)
I usually find my pattern testers on 3 main platforms: Facebook, Instagram and Ravelry.
On Facebook, there are several Crochet Pattern Testing Groups where you can post your "Call For Testers" and get people to apply.
Here are examples of FB Groups you could use to find testers:
- Pattern Testing: Crochet & Knit
- Crochet Pattern Testers
- Elite Crochet Pattern Testers (Need to be a member of Crochet Designer Support Group. They have a 3 strike policy for failure to complete tests)
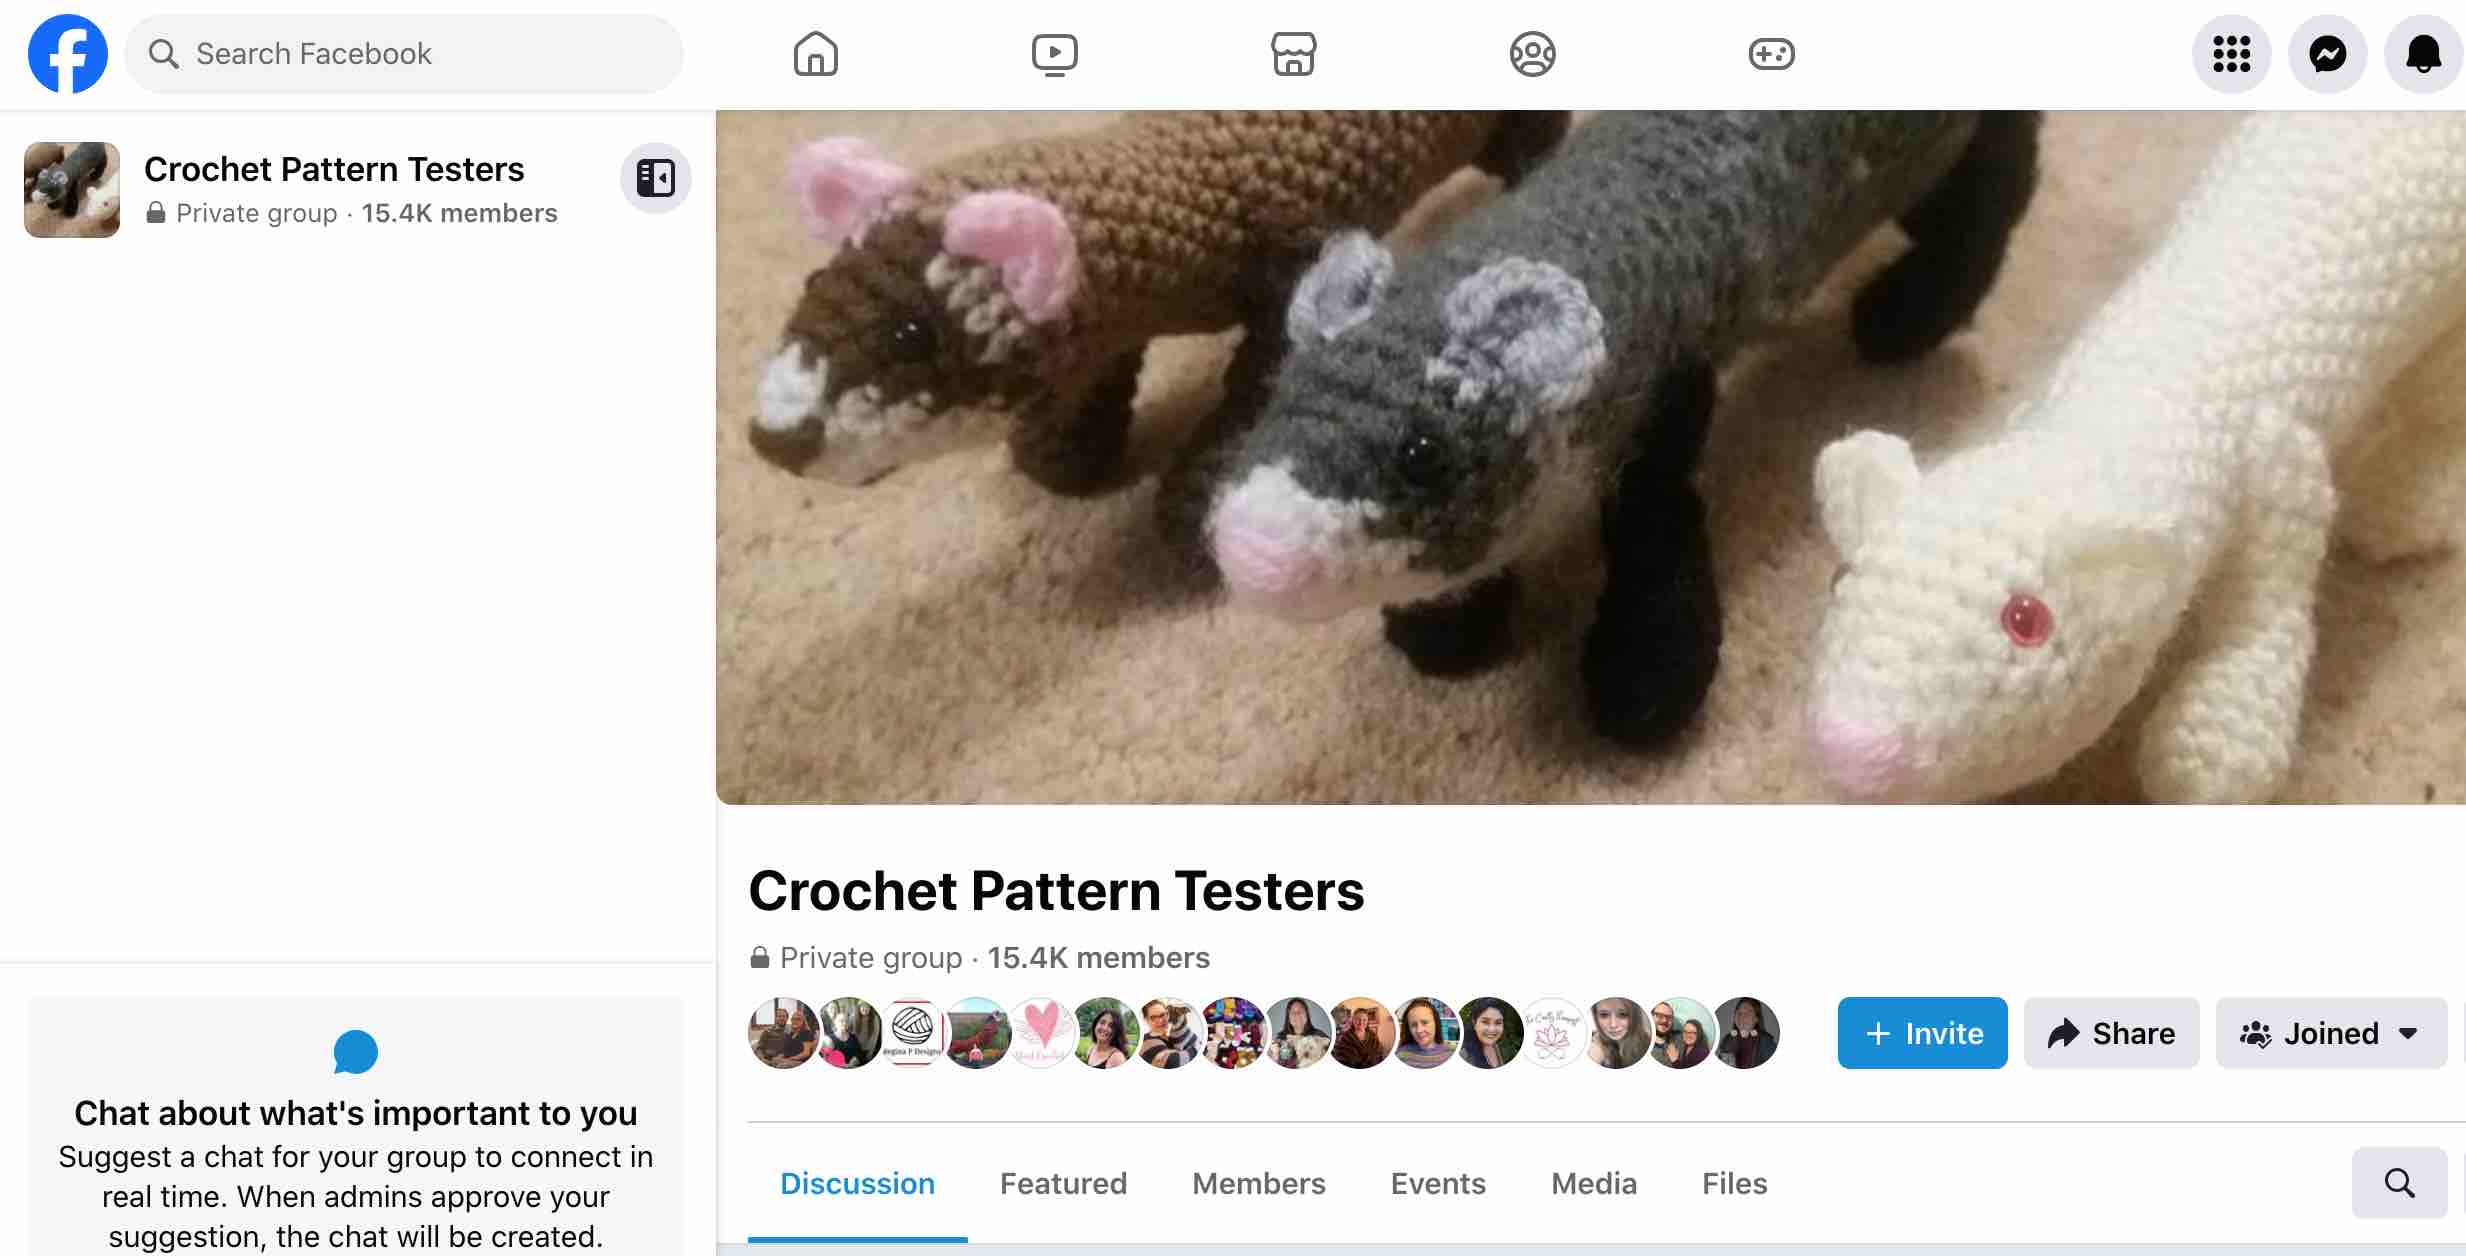
Crochet Pattern Testers FB Group
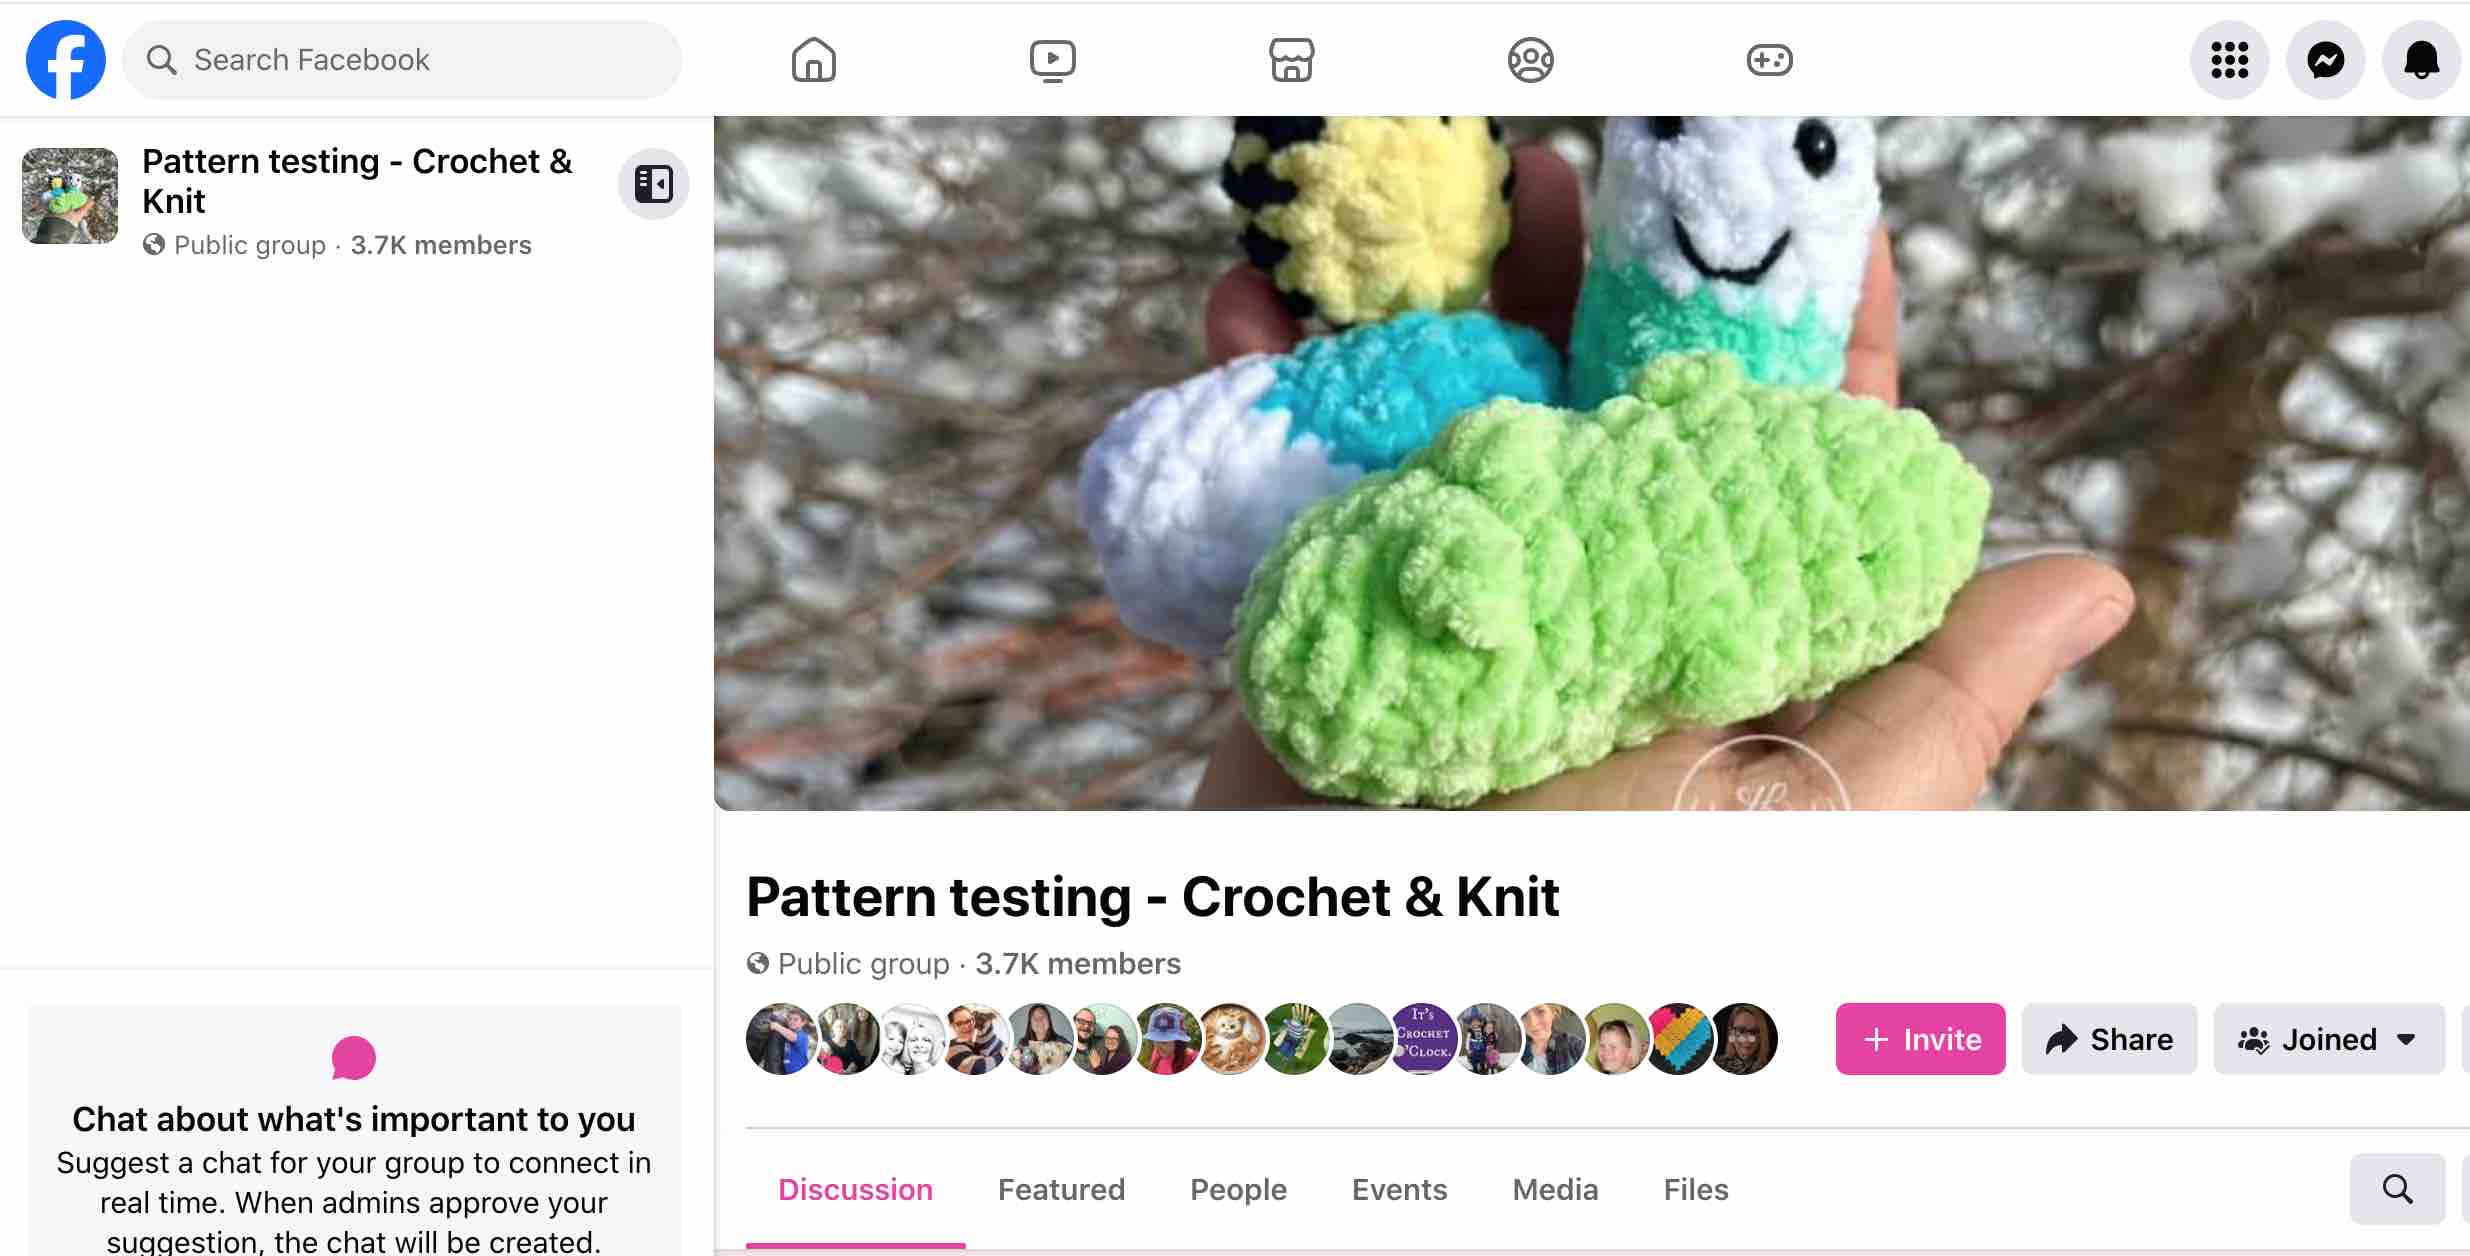
Pattern Testing - Crochet & Knit FB Group
On Instagram, you could create a post and story with your Call For Testers and use the hashtags #crochetpatterntestercall #crochetpatterntest #crochetpatterntesterneeded #crochetpatterntesterswanted or variations of these hashtags.
If you have a favorite designer, then check if they have their own Pattern Testing Group. Many designers keep in touch with their pattern testers this way.
On Ravelry, there's a group called, "The Testing Pool" in the Forums.
Preparing Your Call For Testers
1. Shoot Some Product Photos of Your Finished Crochet Item
Once you've written down your crochet pattern and created your item, you want to take some nice product photos and/or videos to showcase your item to potential buyers.
You don't need to go out and buy a fancy camera just yet. Use your smartphone. It is more than capable of capturing great product photos.
I personally use my smartphone to take some shots of my finished item and then I go back again and take step-by-step progress photos.
This allows me to double check my pattern at the same time by working up the project another time.
Step-by-step progress photos are not essential, but I like to do it to help people visualize what the instructions mean.
It would be great if you could include at least some progress photos in your pattern, especially for parts that need some visual explanation.
If you have no experience with product photography, don't fret! We've all been there!
There are several courses online that help you figure out product photography. I'd highly recommend taking one or two. It'll be very beneficial to you. You can find product photography courses on Craftsy, CreativeBug, SkillShare and Udemy.  Udemy
Udemy.
Make sure you shoot in both landscape and portrait with plenty of background space around your item so it'll be easier for you to use in your graphics later.
2. Edit Your Photos
Once you have a few photos of your crocheted item, you should edit your photos to make sure the lighting, contrast etc. is great.
There are different ways to edit your photo. You can either edit them straight on your phone using your phone's in-built photo editor, upload them to Google Photos, or upload them to your computer and import them into a photo editing software.
I use Canva.com to edit my photos and create all my graphics for my patterns.
Here's an example to show what editing does to a photo:
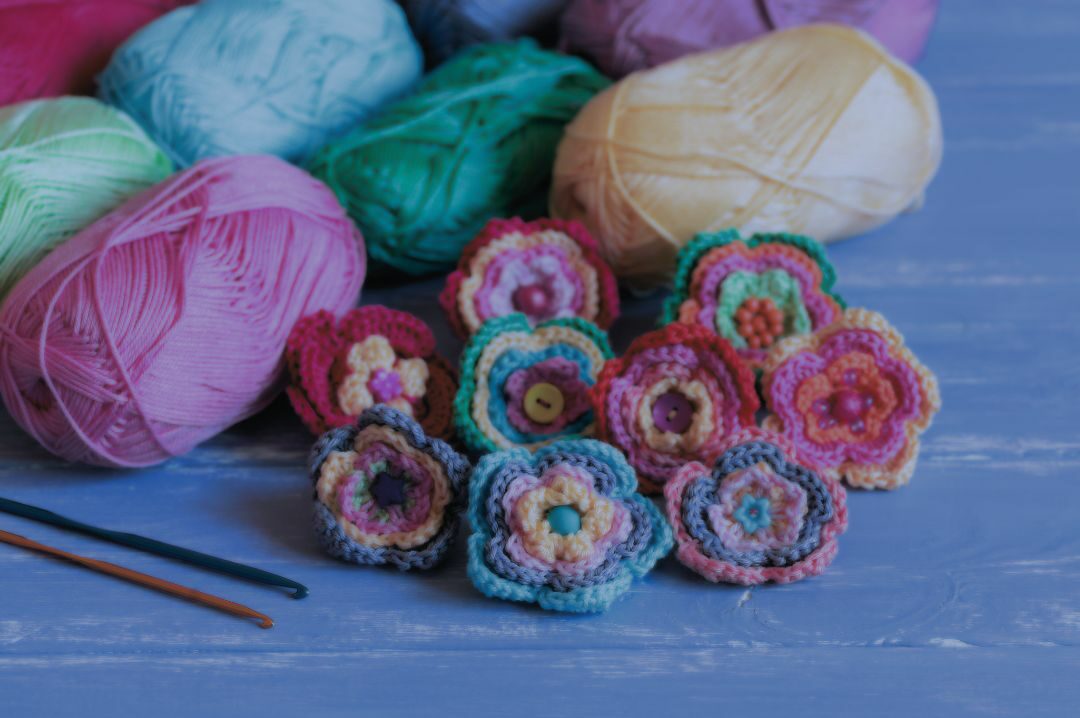
Before photo is edited.
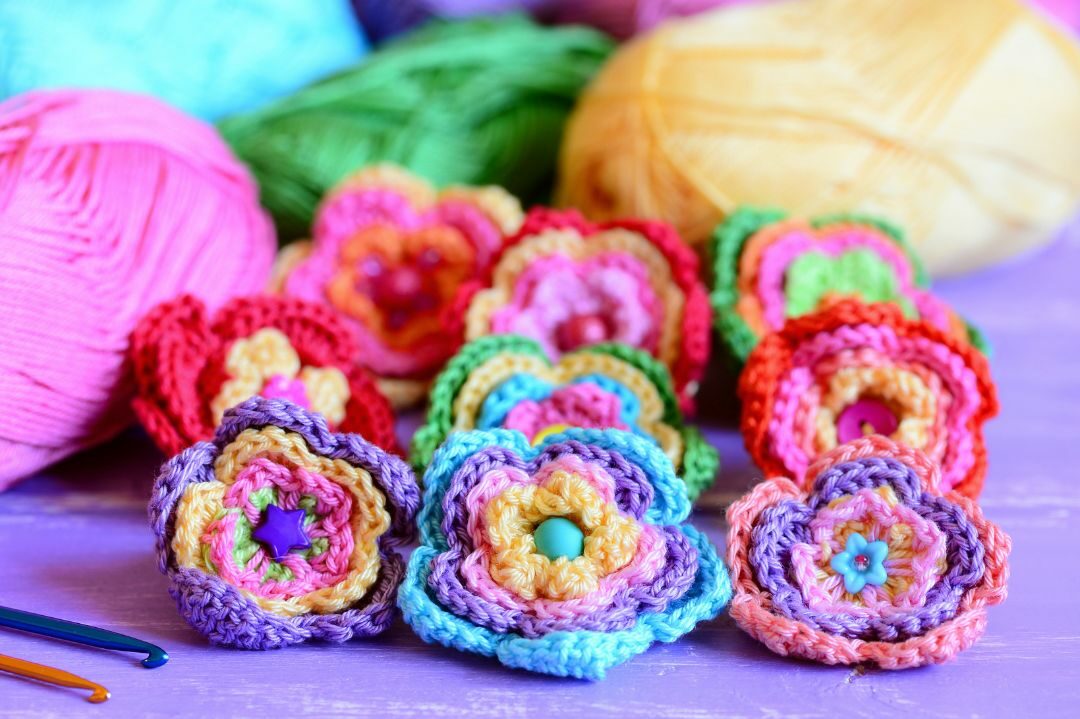
After photo is edited.
3. Create a Graphic
First of all, you need to create a quick graphic for your testing call. You can create this on Canva.com with a free account.
All you need to do is choose a nice photo of your finished item, import it into your Canva project and write "Call For Testers" on the top.
Here's an example:

If you'd like to get access to this template so you can just switch out my image for yours, you can get instant access to it on Canva.com from here:
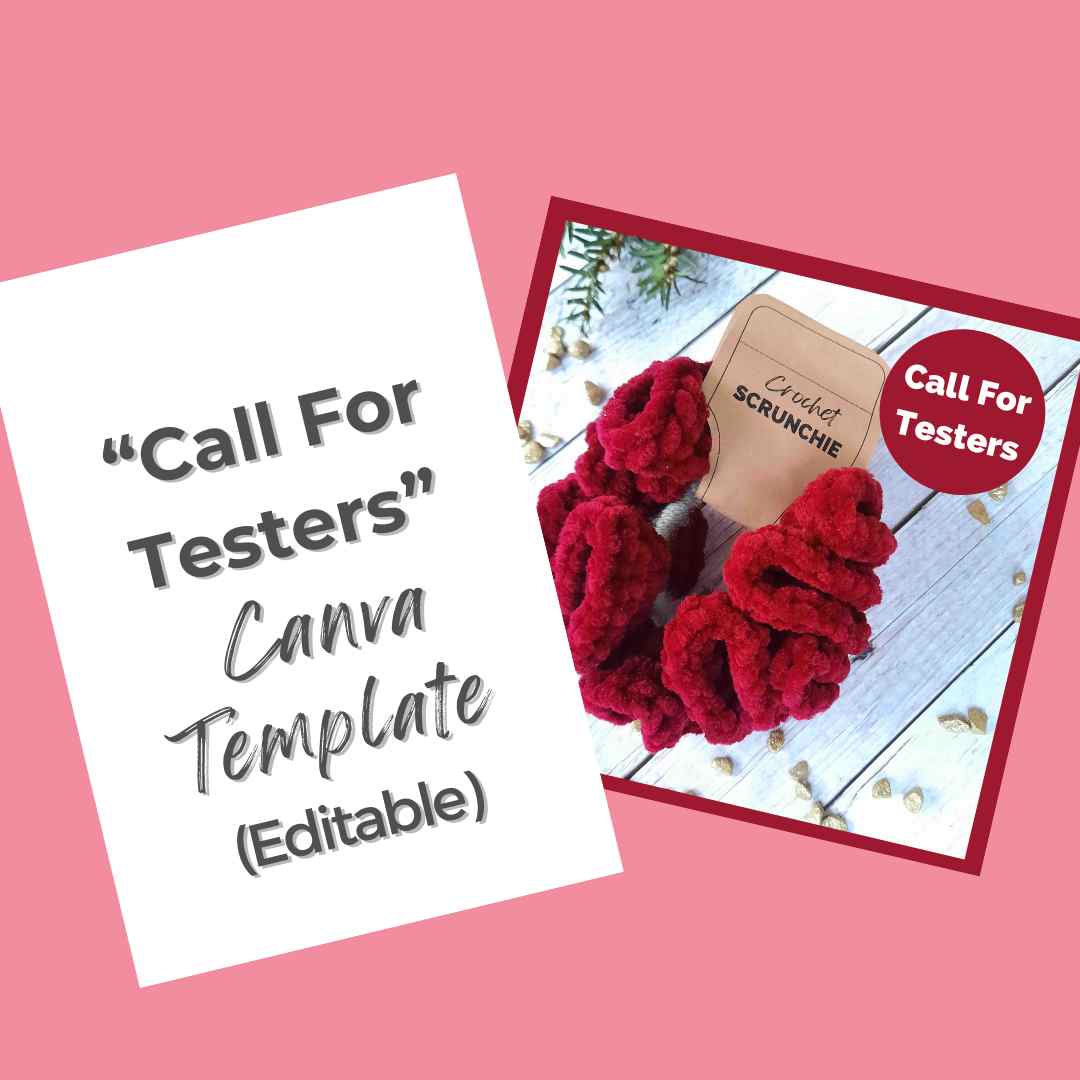
"Call for Testers" Editable Canva Template
Get access to this ready-made "Call for Testers" graphic on Canva.com. Replace my photo with yours, download your image and upload it to FB or IG for your tester call.
4. Create a Project on Ravelry.com
An important step for your crochet pattern test is uploading your pattern info to Ravelry first.
If you don't already have a Ralvery account, I highly suggest you create one now. It's free and will be very beneficial for your crochet pattern writing experience.
So once your account is set up, you click on "Add pattern" to create the listing for your new pattern.
Go through the steps one by one and upload a few photos of your finished product in the photos section.
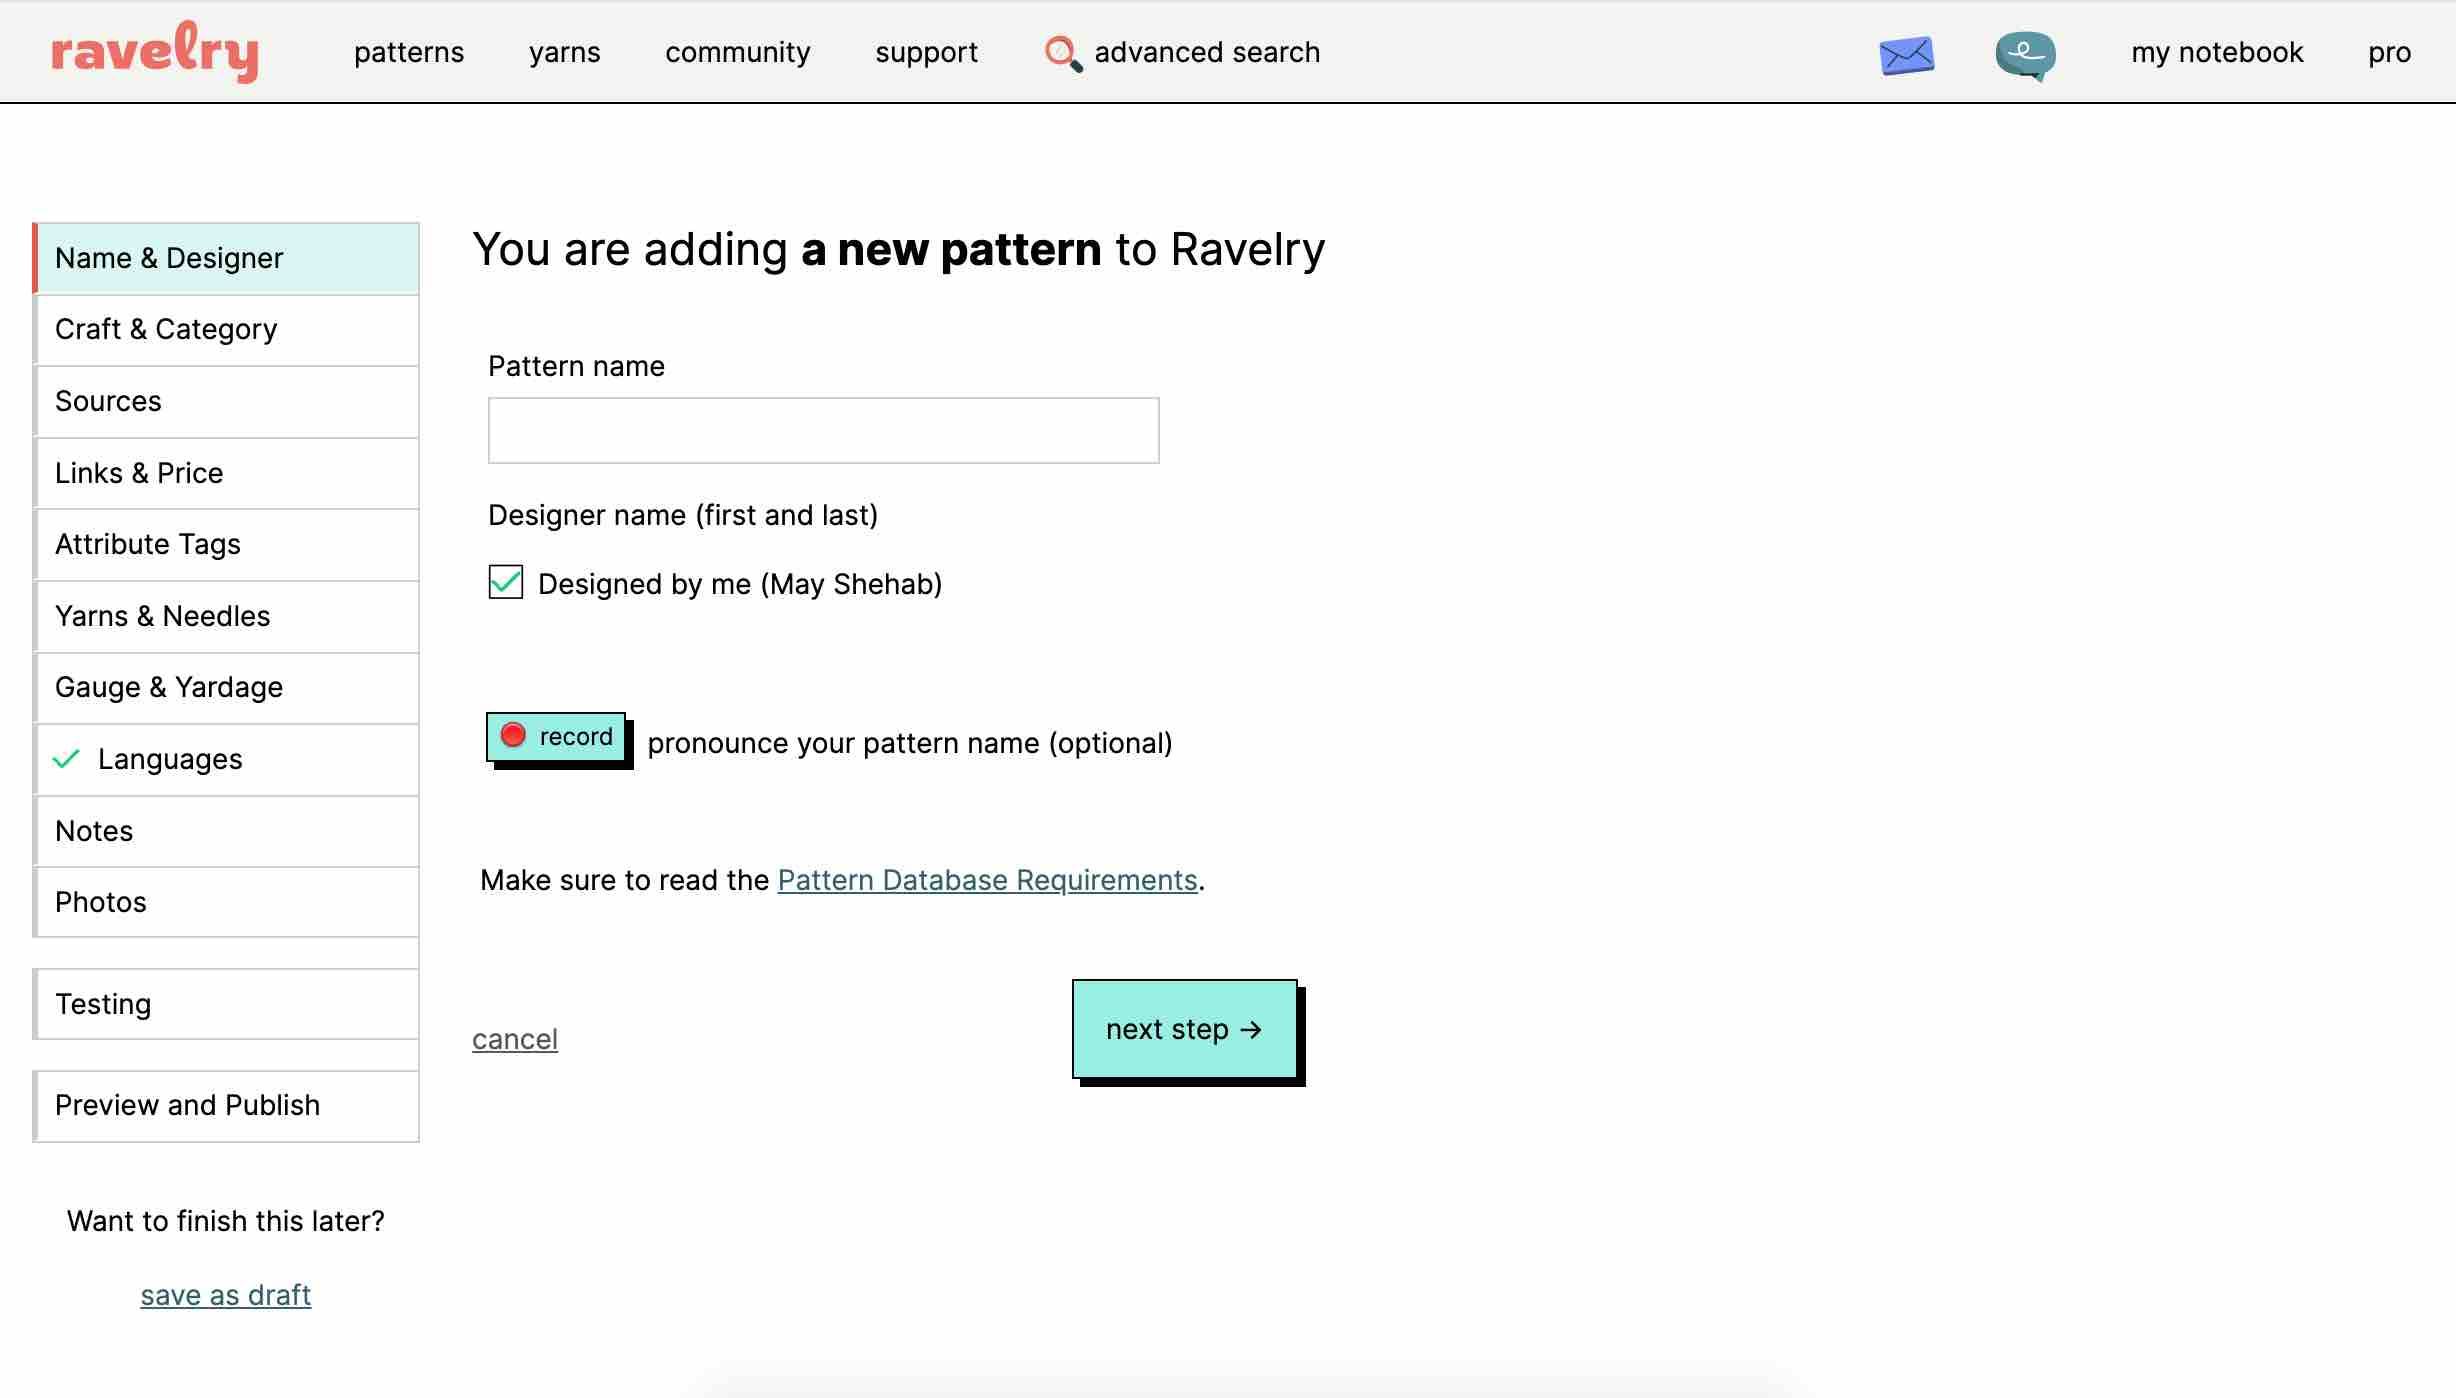
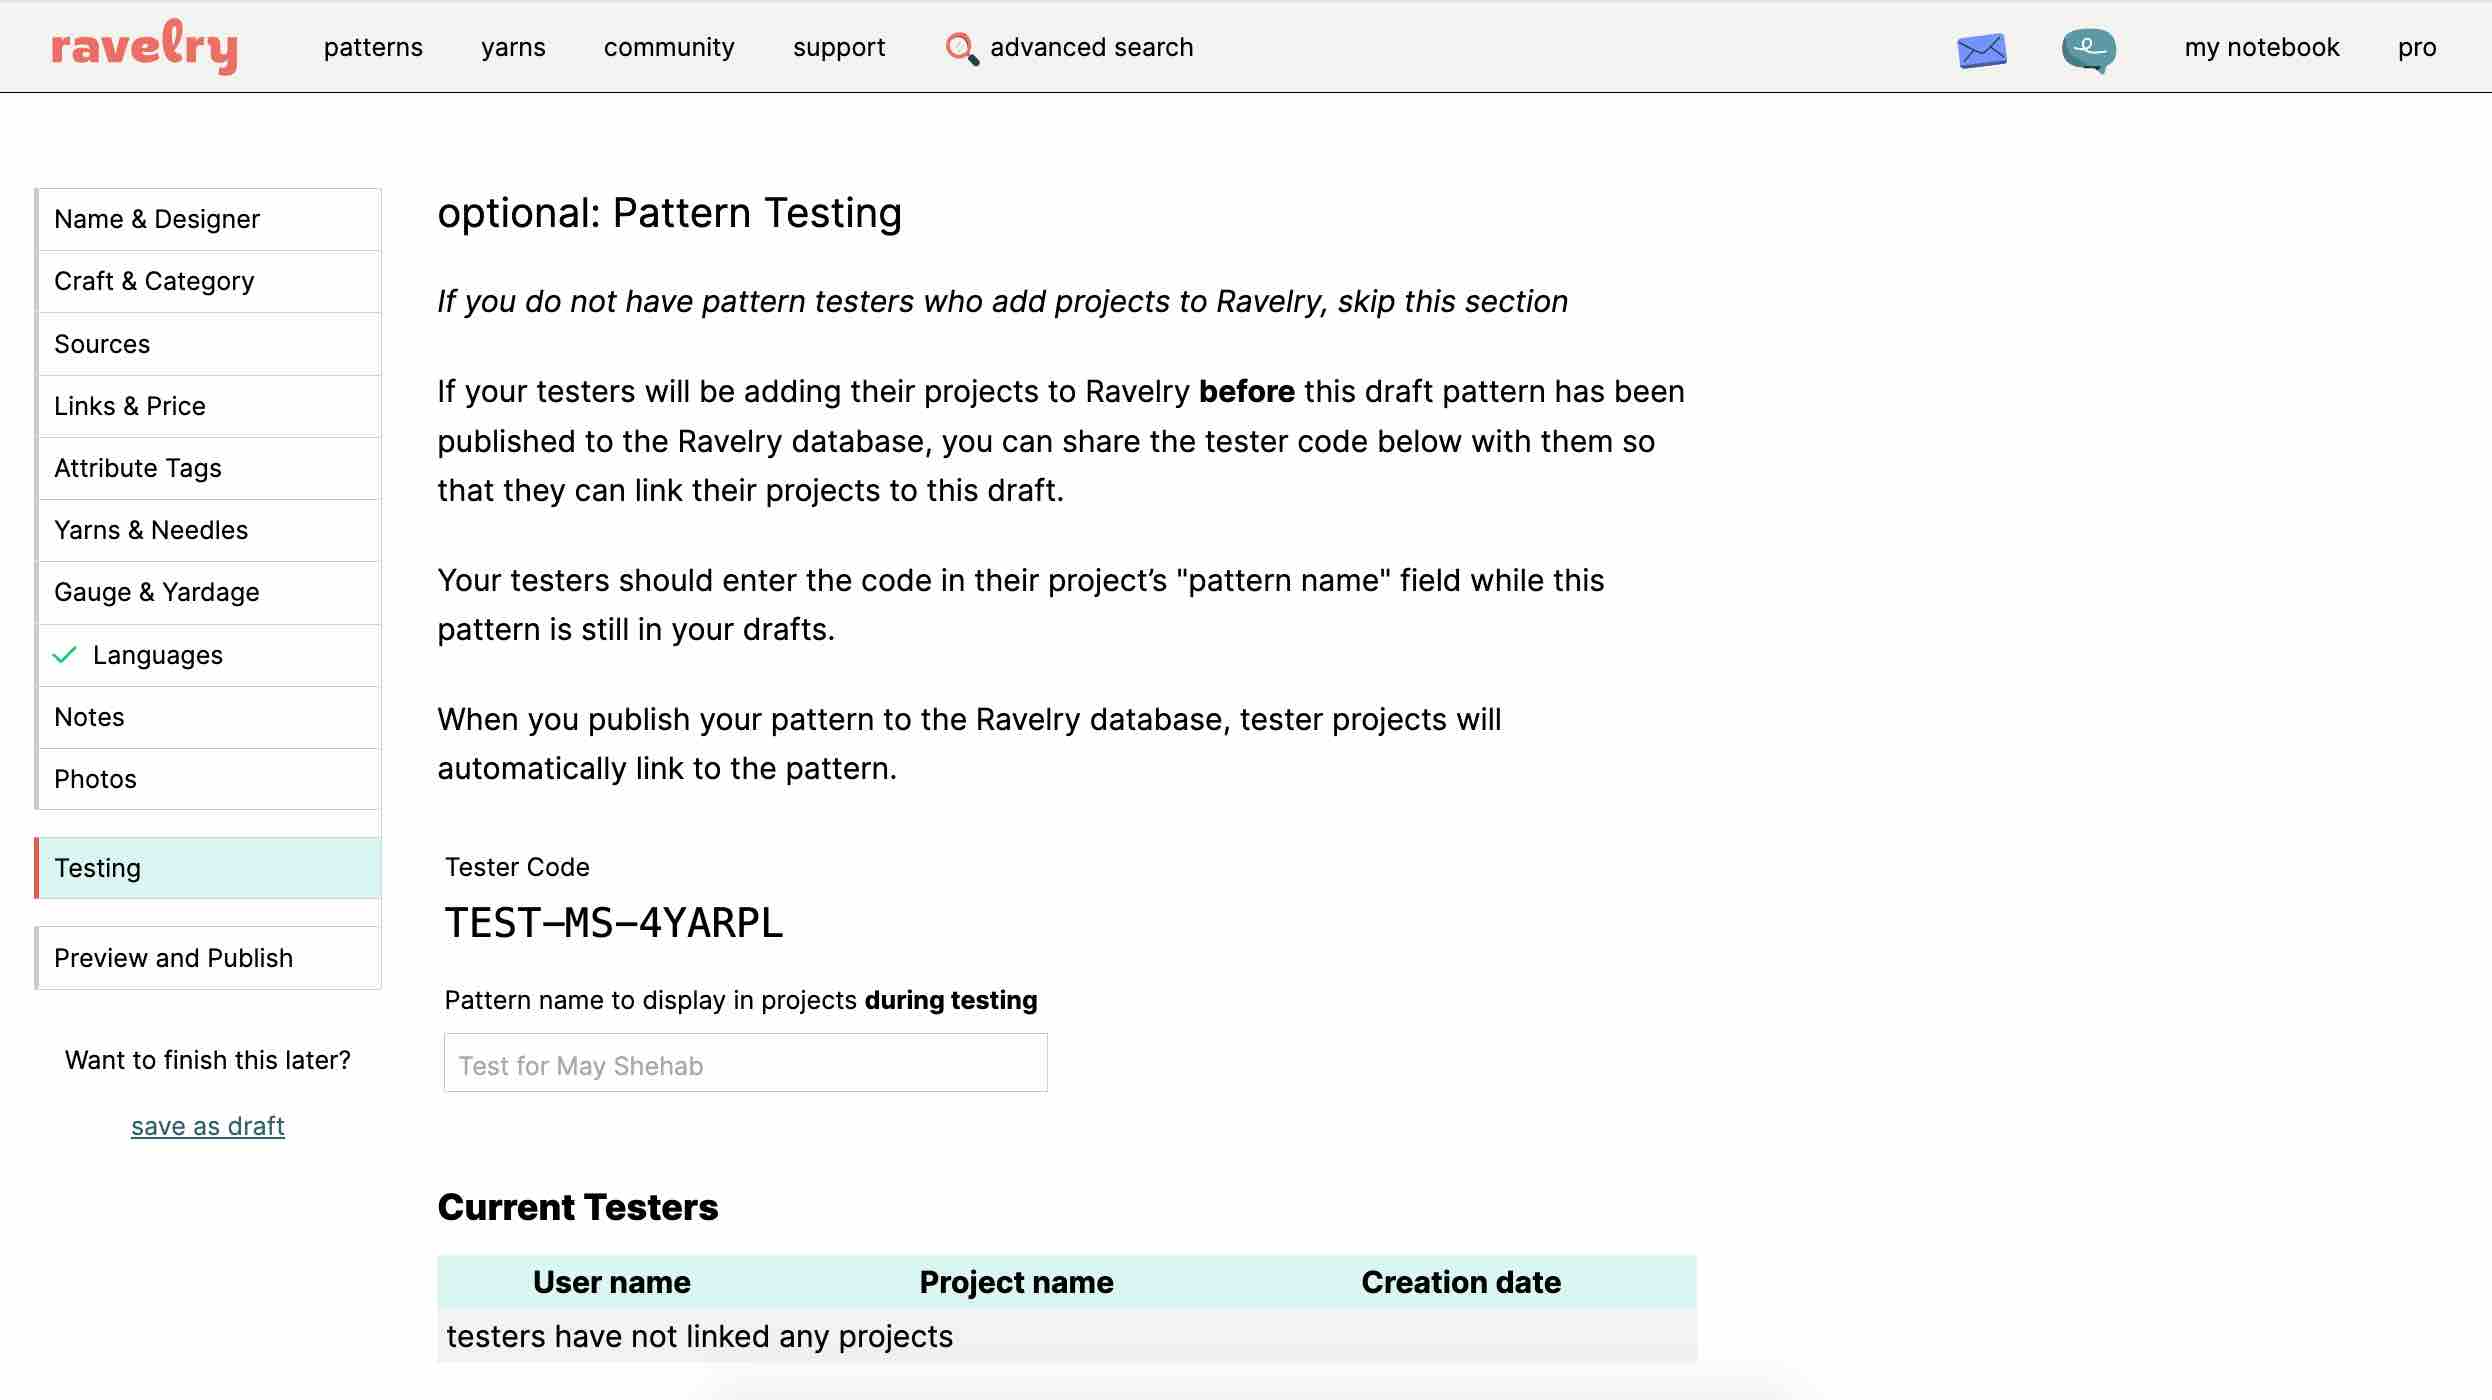
After adding your photos, you'll get to the "TESTING" page.
This is optional, but also very important.
You'll see a Tester Code similar to this:
TEST-MS-4YARPL
Keep this code in a safe place because you'll need to give it to your testers.
5. Create a Tester Application Form
The next thing you need to do is write up an application form to use for your tester call. I found the easiest way is to do this using "Google Forms".
In this form, you should write:
- all the necessary information about your pattern,
- the Ravelry Tester Code,
- your requirements for this test,
- deadlines and,
- what you expect from your testers.
Then you want to ask several questions that will help you choose the perfect testers. The questions are totally up to you, but make sure they are relevant and will help you get the information you need. Here are some question examples:
- the testers' contact details,
- their level of expertise,
- if they can provide quality photos of their projects, and
- if they'd give you permission to use their photos in your marketing of your pattern (you'd still have to give them copyright attribution on their photos).
There are many more questions you could ask. If you'd like to see my personal tester application form, you can have a look here.
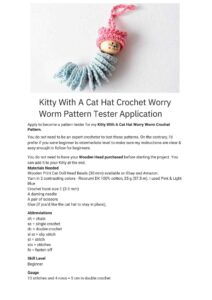
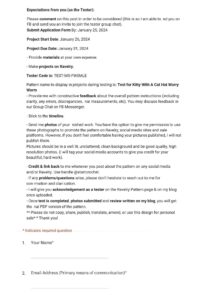
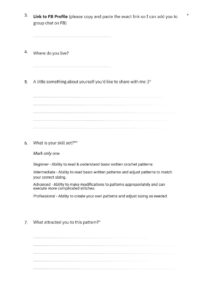
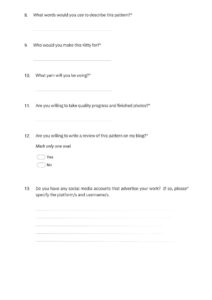
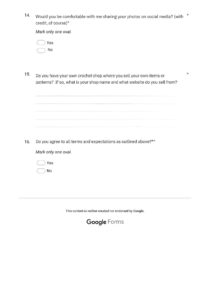
I personally like to have a mix of experience with my testers. I like to include beginners to see whether they'll be able to understand my instructions well, and I also like to have more advanced crocheters that have different perspectives and can give insight and advice.
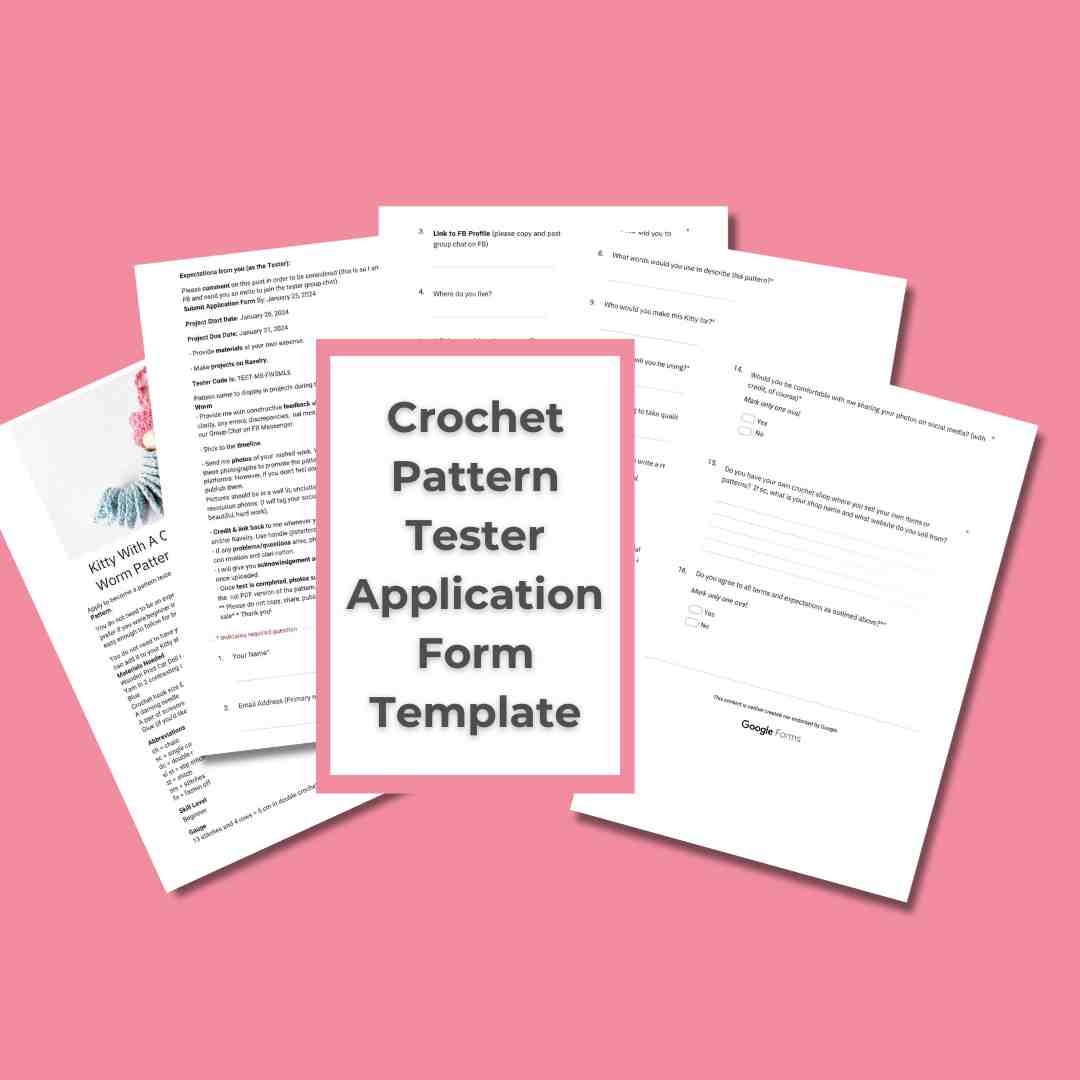
Tester Application Form Template (FREE)
Get access to this ready-made "Crochet Pattern Tester Application Form Template" on Google Forms. Edit it to your needs and send it to your pattern testers to apply for your test.
Preparing for Pattern Testing
Once you have your crochet pattern written down, you have a few choices to prepare for your pattern test.
If you're not exactly sure about how to write a crochet pattern correctly, read this blog post on how to write your first crochet pattern for more information on exactly how to do this.
Decide how you want your testers to access the pattern.
Will you send them
- a pdf copy,
- a shared Google Doc, or
- will you ask them to check out the pattern on your blog/website?
Read this post if you want to know more about how to start your crochet blog.
I tried all of these sharing methods and the one that's working best for me at the moment is to have the testers get the pattern straight off my blog.
And no, I don't publish the pattern to the public before it's been tested...
I publish the pattern on my blog with a password privacy setting.
I share the password with my testers so they can access the pattern during the test.
And I create a pop-up window that tells other visitors to this blog post that this pattern is currently in testing and that they could leave their name and email if they want to be notified when it's released.
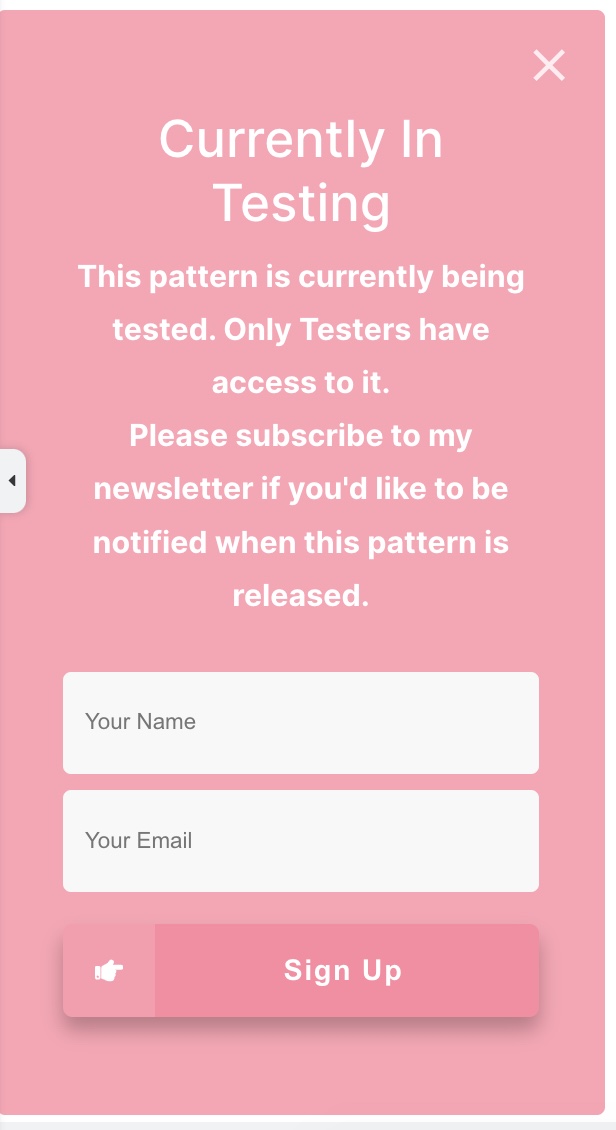
Image of pop-up window I display for pattern blog post that's currently being tested. This is what shows up to any visitor to my pattern blog post who is not a tester.
So far, I find this to be the best option... I'll tell you why.
- This method prevents pattern "theft" (yes, it's theft when someone takes a pdf pattern and runs off with it!)
- I can make changes to the pattern live, so every time I update something, all the testers see the changes right away.
- I generally don't include the progress photos in the pattern at the beginning of the test, so I can tell that people are able to work up the pattern without the photos too.
- I add the progress photos to the blog post towards the end of the test and ask the testers for feedback.
If you don't have a blog, you can divide your pattern into parts and release each part to the testers as they complete them.
Google Docs also has a sharing option, which is great because this way, people will see updates as you make them.... provided they don't print out the pattern right at the beginning... which most of them would do.
Note: If a particular tester asks for the pattern in a printer-friendly form, I usually give it to them, no questions asked. I prefer not to make this the norm, but some testers just prefer it that way, so that's alright... as long as they don't run off with it!
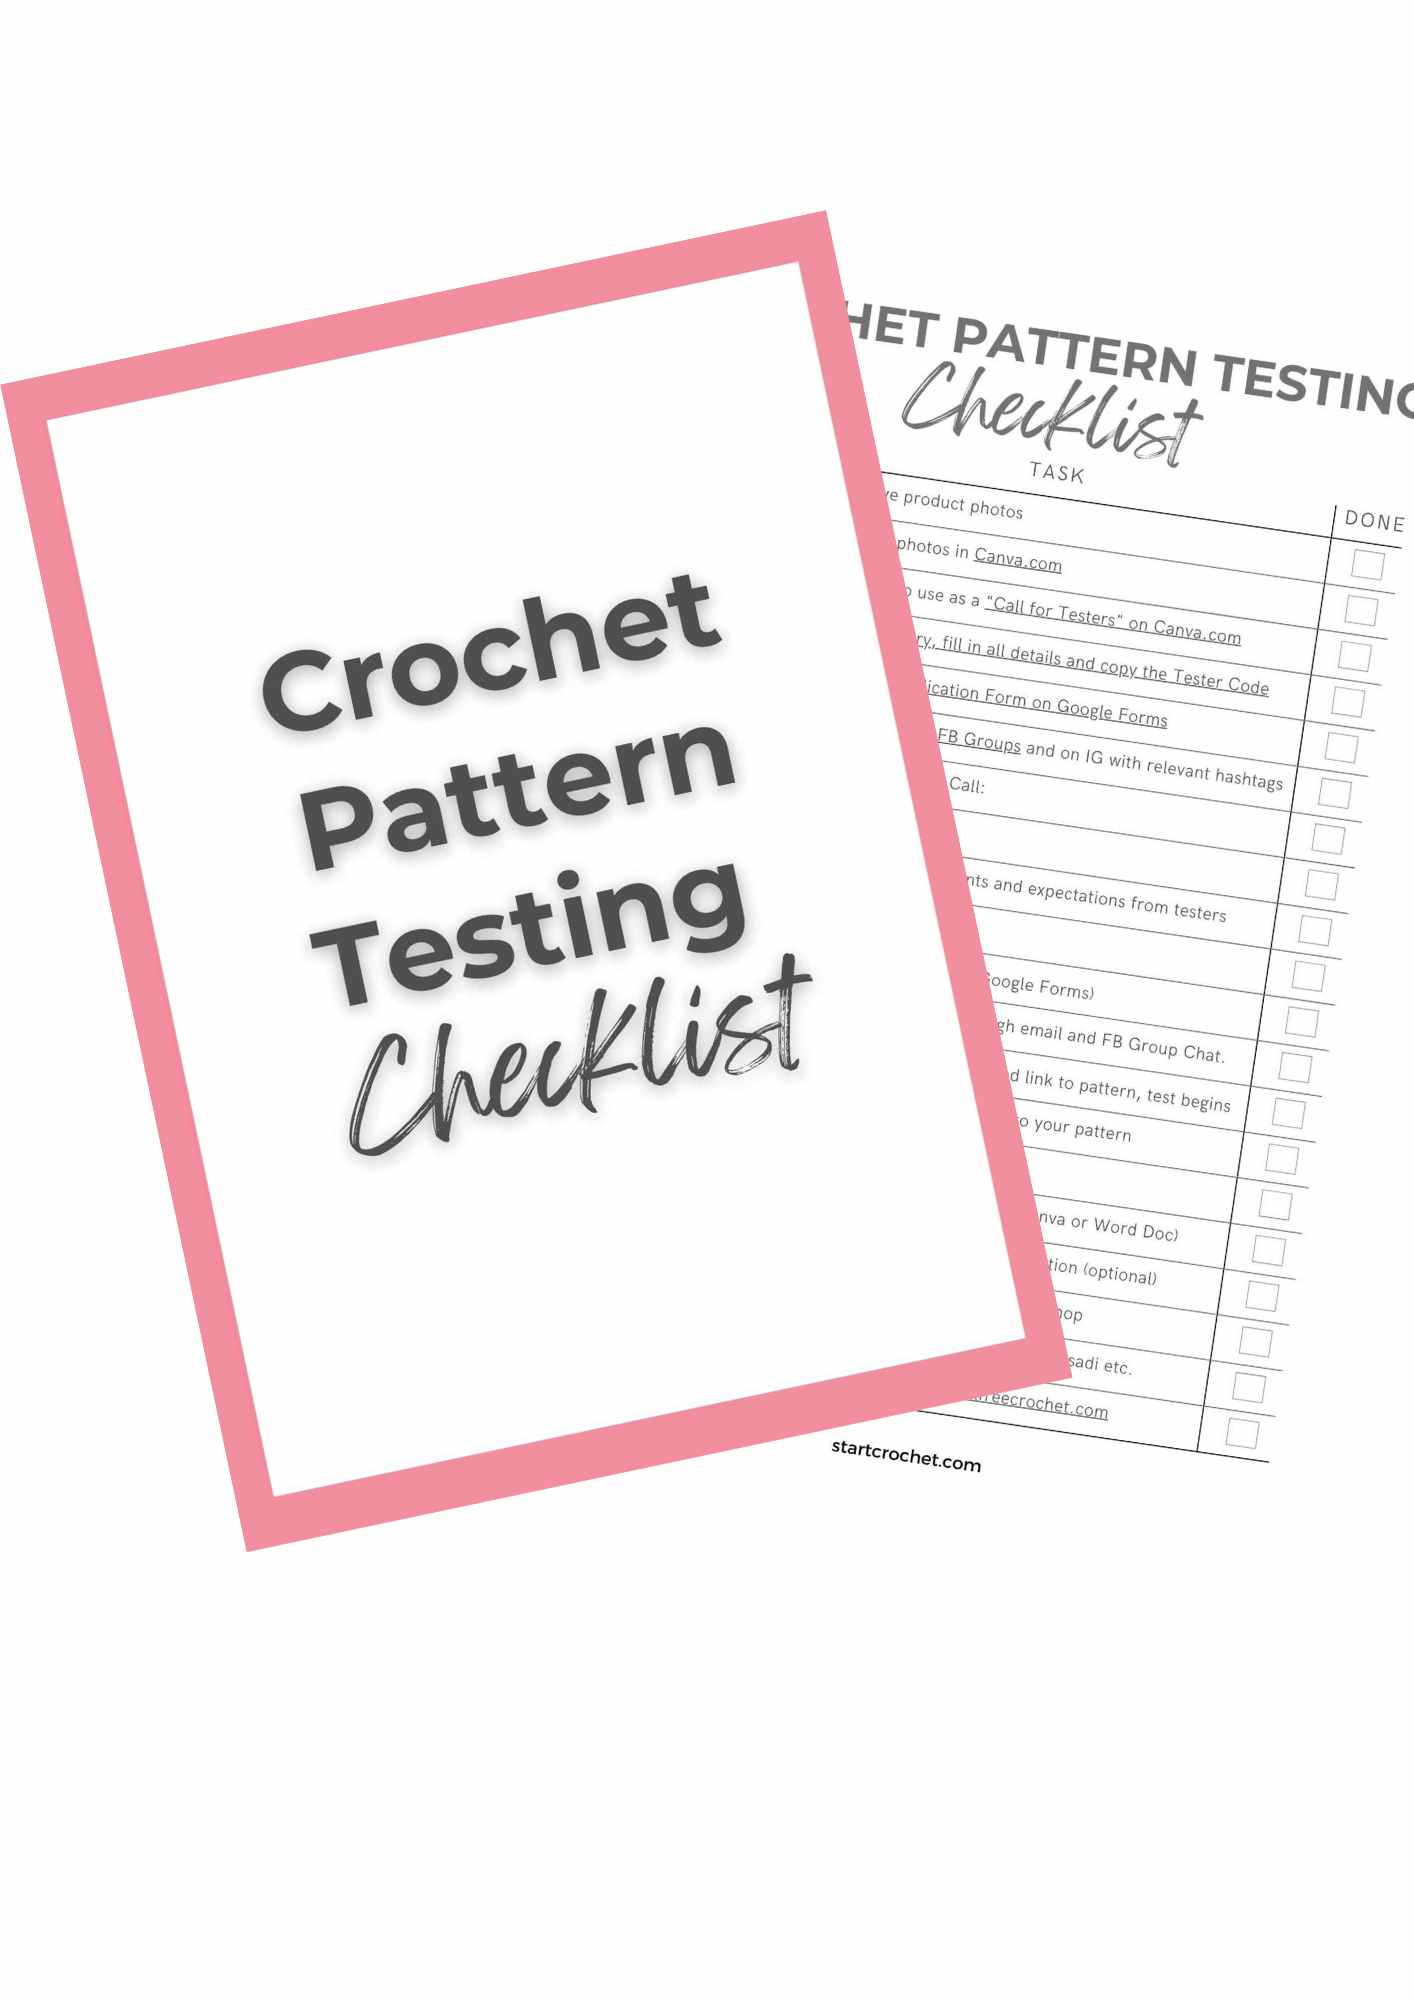
Crochet Pattern Testing CHECKLIST (FREE)
Step-by-Step Process
Get access to this Testing Checklist to find out the exact steps of how to conduct a crochet pattern test before you release your pattern to the public.
How To Stop Testers From Printing Your Pattern from Google Docs
If you'd prefer your testers not to print your pattern before you've made the necessary changes to it, then you can stop them from printing in the sharing settings of your document. Here are the steps:
- At the top right (cog), click Settings.
- Uncheck "Viewers and commenters can see the option to download, print, and copy".
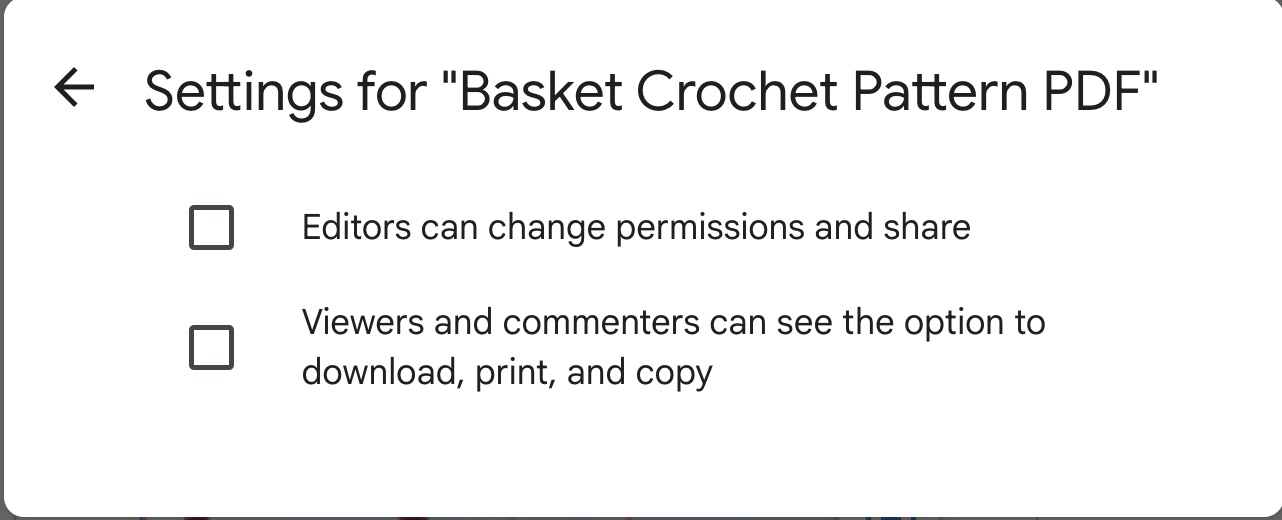
You do want to allow your testers to leave comments though, so you can do that in the Settings and click on "Commenter Access".
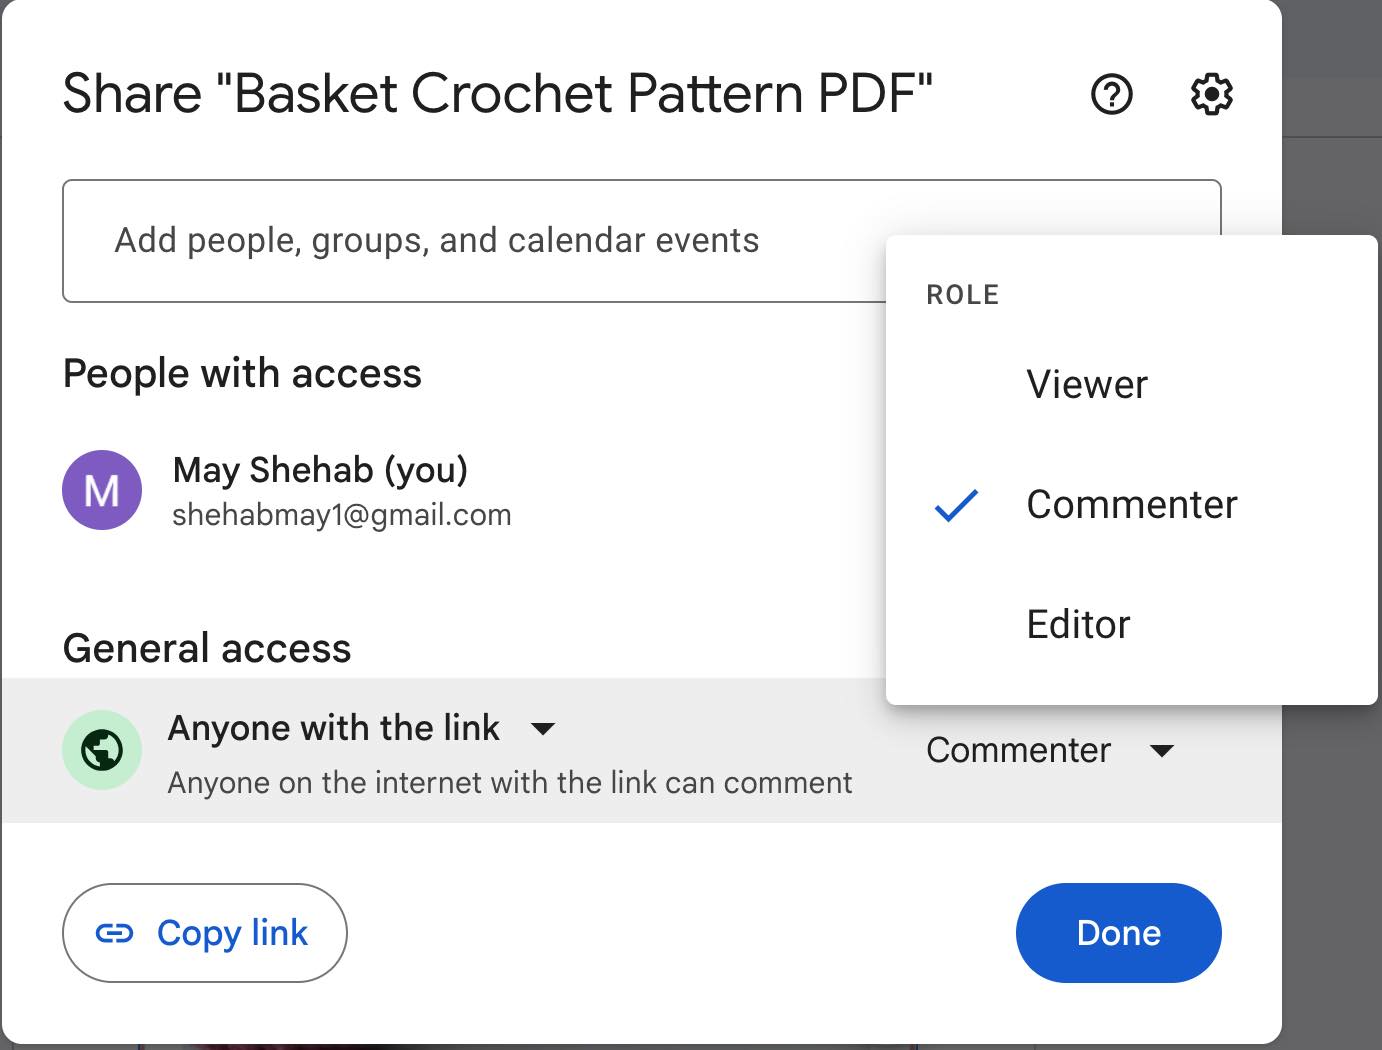
Choosing Your Testers
So once you've decided on what method you'll use to give the testers access to your new pattern, the next step is to go through the submitted application forms and choose your testers.
Make sure you have a good variety of skill levels and decide on how many testers you want for this test.
You could have just a couple, but I like to have an average of 10 testers per test.
Sometimes it's a little bit challenging to keep track of everyone's progress, but with armed with your trusty notebook or an excel sheet, you can track them easily (see details below)
Write down everyone's name and contact info on this excel sheet and start getting in touch with them to let them know they've been accepted to your test.
Conducting the Testing Process
Now that you're all set to start the testing process, you have another decision to make.
Where will you congregate all the testers so you can communicate with them?
Will you use email and send group emails?
I tried this email method and would not recommend it because it's difficult to keep track of the email threads and not everyone sees what others are sending.
What I would recommend, however, is to start some form of group chat. Either IG or FB messenger work well for this purpose.
At the moment, I'm using FB messenger for my Testing Group Chats.
How to Set Up a FB Group Chat for Testing
Group chats can only be conducted from personal FB accounts, not pages or groups.
So here are the steps to create a Group Chat:
- log into your personal account,
- click on Messenger in the top right corner,
- then click on the pencil icon to start a new message.
- Start typing the FB names of the chosen testers separated by commas.
- Click on chat settings and add a photo of your pattern
- Change the name of the Group Chat to the tester group.
- Write a warm welcome to your testers, give them all the info they need to start the test, and ask them to verify that they've received this invite (because sometimes FB glitches and people might miss your group invite).
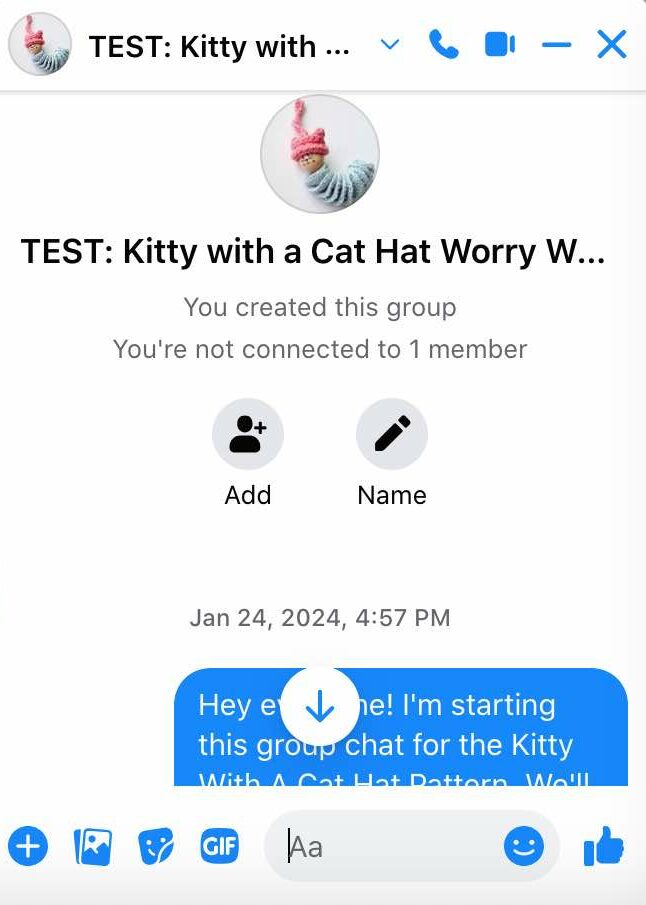
Example of FB Group Chat for Crochet Pattern Testing
Follow up on this FB Group invite with an email to your testers where you write your welcome message, information and requirements for starting and submitting the test. Make sure they actually got the FB Group Chat invite.

Another Group Chat you could try is "Discord". I've tried it a few times and it works well too. Check it out at www.discord.com.
Analyzing Feedback and Making Revisions
So once the test has started, you might find some testers asking questions or sending feedback.
The great thing about these group chats is that testers communicate with each other as well.
I try to be as prompt as possible in answering people's questions and updating them with any changes to the pattern, but sometimes when I'm asleep in the middle of the night because of time zone differences, other testers step in to answer questions.
If someone spots a mistake in the pattern, it's always good to verify the suggestion with other testers as well. Once you've come to a conclusion, make your edits to the pattern.
These group chats really do allow a great space for open communication throughout the revision process of your pattern and it's also lovely to get to know people from all over the world in the process!

Keeping Track of Tester Progress
It's very important to keep track of your testers' progress and it's quite simple to do that, if you have everything organized beforehand.
As I mentioned earlier, you could just use your notebook to write down each testers' progress, or you could use an excel sheet for this.
Some people use other software like Asana to keep track, but I find that this is overcomplicating things a little.
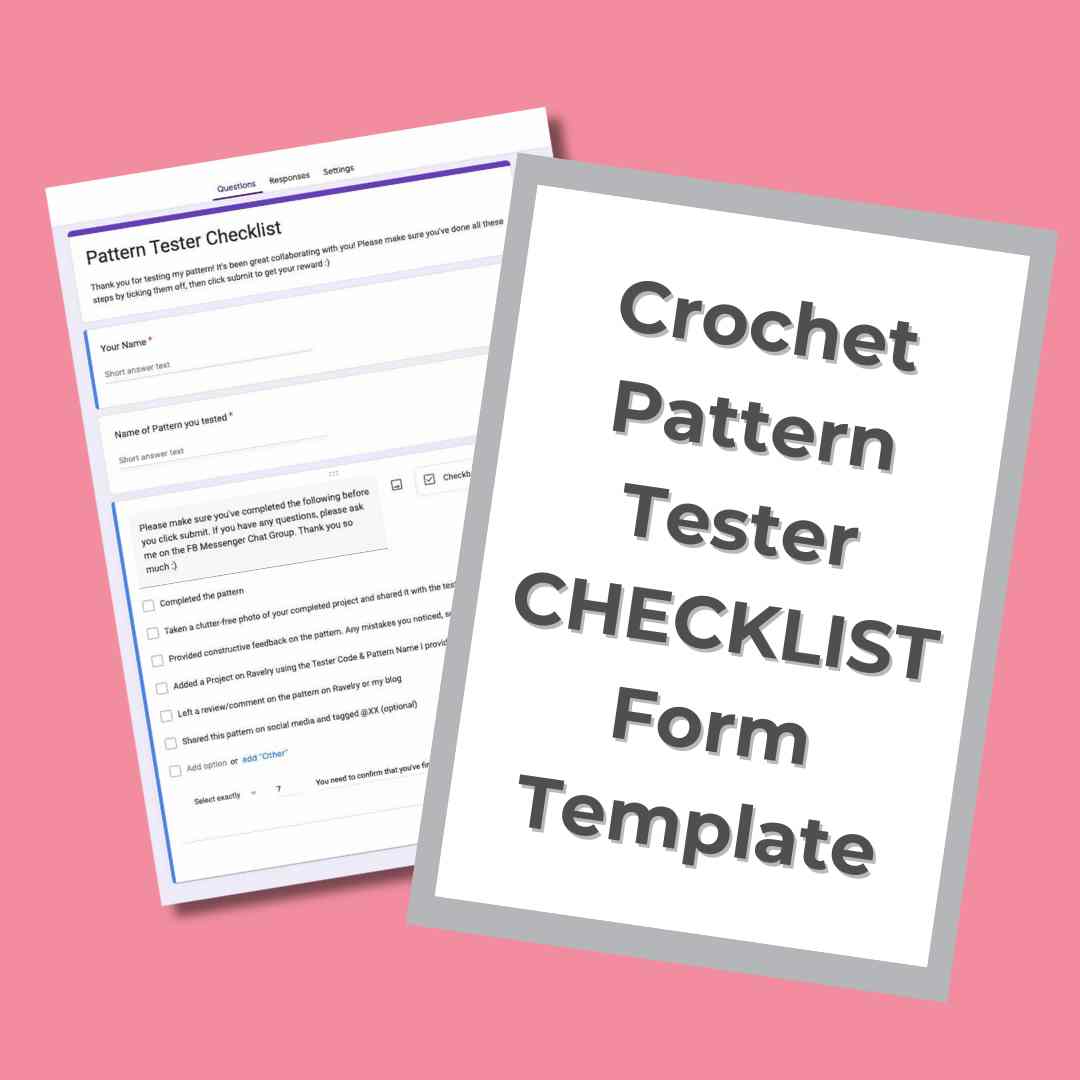
Crochet Pattern Tester Checklist (Free Template)
To make sure that the testers have completed their test, it's always best to make sure you are clear on what you're expecting of them.
I like to do this in the form of a checklist so everyone knows exactly what they're supposed to do because naturally, different designers have different requirements and testers might get a little confused.
What I normally do is write a checklist on Google Forms for testers.
This is helpful for them:
- To know what steps they should take for this test,
- To verify that they've completed each required stage of the test,
- And to receive the "Thank You" note and compensation/reward automatically.
If you'd like to have a Checklist template to work from so you don't have to spend too much time thinking about what you should write in this checklist, sign up below to get immediate access. Make a copy of the template and edit it to suit your needs.
Tester CHECKLIST Form Template (FREE)
To send testers to verify test completion
Get access to this ready-made "Crochet Pattern Tester Checklist Form Template" on Google Forms. Edit it to your needs and send it to your pattern testers when they've completed their test.
I used to ask my pattern testers to share on social media, as you can see in the checklist above, but I stopped doing this for a couple of reasons:
- I read on some FB groups that testers don't like being forced to share their photos on social media (which I find quite fair),
- I felt I was pushing it with all the requirements I was asking of them (although they never really complained to me),
- I didn't see a substantial result from testers sharing their photos on social media,
- and I preferred having them leave an honest review on my blog.
How to Compensate/Reward your Pattern Testers
If you're wondering whether crochet pattern testers should be paid, the answer is... well... not so clear. But generally speaking, pattern testing is a voluntary activity and cash payments are rare.
Pattern testing is different from tech-editing, which is a paid service. We'll get into tech-editing in just a minute.
Testing is widely understood to be done for free, with some sort of compensation to encourage testers to participate and to thank them for their time and effort.
Testers are usually required to use their own materials to conduct the test, so sometimes they need to go out and buy the yarn required for the test.
Established designers or companies might provide testers with materials, but I'm talking about us, regular crochet designers.
Some designers feel it is fair to provide the testers with the final PDF version of the pattern for free.
I do this and also give them a $5.00 coupon that they can redeem from my shop.
Testers have been happy with this form of compensation so far.
If you've subscribed to this TESTER CHECKLIST form above, you can add your compensation straight into the Settings section to be sent automatically when each tester completes the checklist.
Click on Settings --> Form Presentation --> Confirmation Message
What is Tech-editing in Crochet?
Tech-editing (technical editing) is a paid service where the professional tech editor reads through your pattern to check for inconsistencies, errors, typos, clarity, conciseness, completeness and style.
They are mostly hired to check for sizing, in the case of garments. There's quite a bit of maths involved, so they're the experts in making sure your stitch counts are correct, the use of industry standards if spot on and that you don't have any punctuation errors.
Tech editors are not required to actually work up your project. For that, we use testers.
If you're on the lookout for tech-editors, a quick google search will show you many options to choose from.
There is also the Tech-editor Hub FB Group that you may join.
Which comes first? Tech-Editing or Testing?
The sequence of tech-editing and testing can be done either way. Some argue that it is better to tech-edit first so that testers don't have to bother with fixing errors and can focus better on working up the project. Others argue that tech-editing should be done after the test so the tech-editor's work becomes easier and you don't have to pay so much for their work.
Many designers don't use tech editing at all because they feel they would never be able to recoup the costs of editing because their pattern sales are low or their price-point doesn't warrant paying a professional an hourly wage. They depend on their testers to do this part for them.
So in summary, there is no right or wrong answer to this question. It's really up to you to decide which route you'll take.
Publishing Your Pattern
So now that you know all the steps you can take to test your crochet pattern, you might be thinking that this is a really long and tedious process!
Don't be disheartened! Once you get the hang of it and have all your templates in place, the process becomes much faster.
These days, my tests take less than a week from start to finish (from when I announce the call for testers to publishing the pattern). My patterns are rather small, so they don't take too much time.
So once you've done all the edits to your pattern and have gotten feedback from your testers and tech-editor (optional), it's time to publish your pattern.
I normally publish my patterns on Ravelry first, then remove the password from my blog post and link my blog post to Ravelry.
I then work on the PDF version of the pattern.
I send it to my testers as a thank you for their time and effort.
I upload it to my shop on my blog and create a listing for it.
I upload it to my Ravelry shop and create a link to that shop on my blog post.
I upload it to other platforms like Etsy, LoveCrafts, YarnSea etc.
An easy way to upload to more than one platform is through GOSADI. They help you import all your Ravelry patterns to their platform and from there, you can export to Etsy and other marketplaces easily. What a time-saver!!
Summary
So in short, once I've written down my pattern, here are the steps I follow to test it:

Crochet Pattern Testing CHECKLIST (FREE)
Step-by-Step Process
Get access to this Testing Checklist to find out the exact steps of how to conduct a crochet pattern test before you release your pattern to the public.
I hope I was able to help you figure out how to test your crochet patterns. If you follow this guide step-by-step, you should be able to conduct a successful pattern test.
Remember that it's worthwhile to invest some time and effort in the pattern testing process. This way, you'll ensure the best possible outcome for your patterns AND your customers.
Let me know if you have any questions or comments. I'll be happy to answer them for you.
Have you tested crochet patterns before? What experience did you have? I'd love for you to share your thoughts in the comments below.
Check out these related posts that might be interesting to you:



Thank you for creating this post! It was all I needed to get started!
Oh fabulous! So glad to hear this 🙂 Please do let me know if you have any questions and best of luck!! 🙂